Nissan Maxima Fuel Injector Change Tutorial
NOTE: Today I had to replace the injector I initially installed during this tutorial. I've made note of the updates since the original tutorial. I did less work this time and only replaced the injector. If you only want to replace an injector these notes will help save you time versus doing all of the other work that was done along the way. It took me three hours to replace the injector without cleaning everything as outlined below. If you have a mechanic replace your injectors you probably want to have them all done because it's probably three hours labor plus gaskets if they have to go back in. But if you do it yourself you can do just the injectors you need and spend three hours of time plus about $10-20 in gaskets. A full set of injectors is $600-750 but it's up to you. Time versus money.
NOTE 2: I had another injector go out. Due to the injector I bought to replace it being bad right out of the box, and due to a leaky fuel hose clamp, I had to do this three times in three consecutive days. I'm reluctantly getting good at this and it only took me a half hour to tear it down on the third day. I have added some more tips to the tutorial based on what I've learned.
Recently my 1991 Nissan Maxima, with the VG30E engine, was running poorly and was clearly underpowered. I had just had problems with my MAF (mass air flow) sensor so I thought this might be it again. But it wasn't quite the same problem so I started searching online for similar symptoms in other Maximas. What I found was that one of the fuel injectors had gone bad. There are two ways to test for this and they really should be done together.
The easiest thing to do is pull the spark plug wires one at a time and see if the problem gets worse or stays the same. If it gets worse you know that cylinder's injector is working. If the problem does not change then you know that the injector for that cylinder may not be working. It could also be a bad spark plug, bad spark plug wire or a few other things. So make a note of any cylinders that may have been injectors based on this test.
Next you'll need a multi-meter put on the ohms setting. A good injector will measure around 10-14 ohms across the injector's two terminals. If your injector shows no reading or one significantly outside this range then you have a bad injector. In order to test the two terminals you'll need to remove the injector's terminal plug. It's the type of plug that has a thin metal wire wrapped around it to hold it in place. The removal of these plugs requires a steady hand and a little patience. Otherwise you'll end up with a wire keeper somewhere in your engine compartment or shop floor.
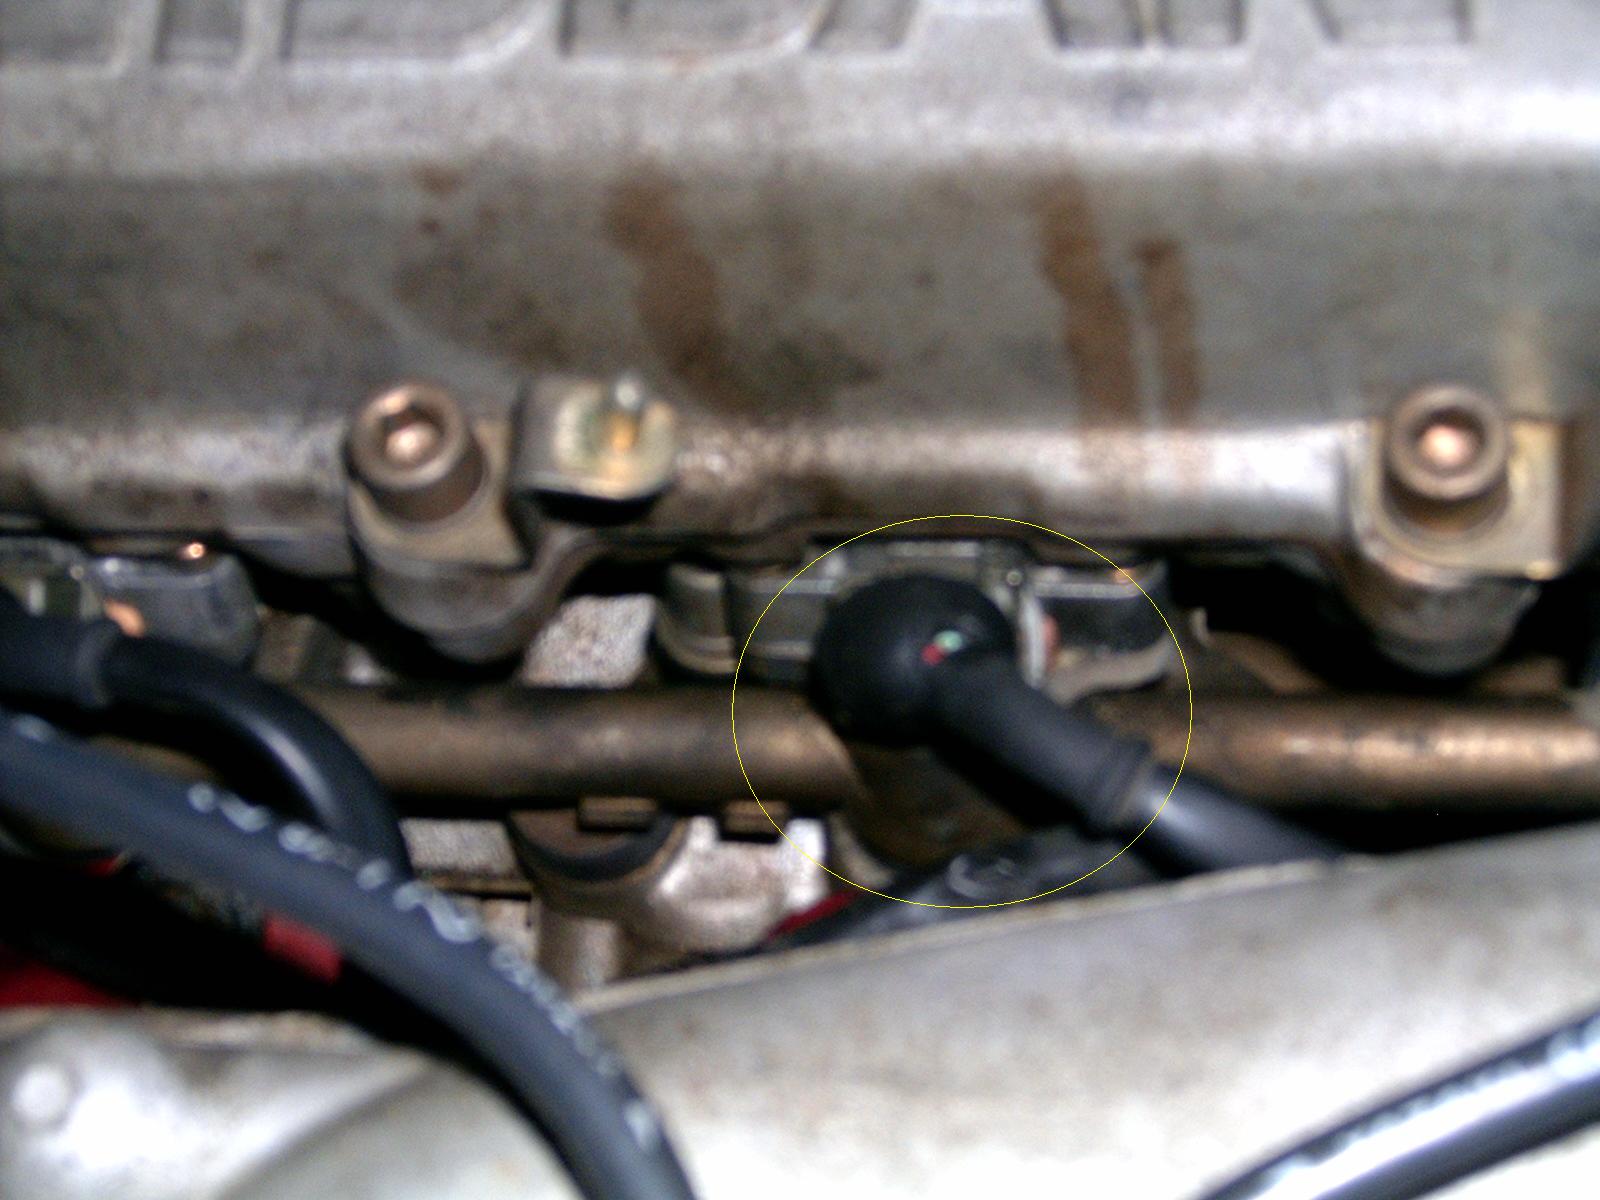 To remove the wire keeper you need to slip a small flat screwdriver, like an eyeglass screwdriver, under the wire keeper. The keeper has two corners but the fourth side is open so this is how it slips out. Work the screwdriver into the long side of the wire keeper (not the open side) and slowly pry out enough that you can then grab it with a pair of needle nose pliers. Be careful. Remember playing the game "Operation" as a kid? That kind of careful. If you're really careful you can leave the keeper just barely on the plug, about 3/16", and the plug can be pulled off and the more easily replaced. I wouldn't recommend that if you're not familiar with these plugs and you could lose the keeper into the nether regions of your engine compartment.
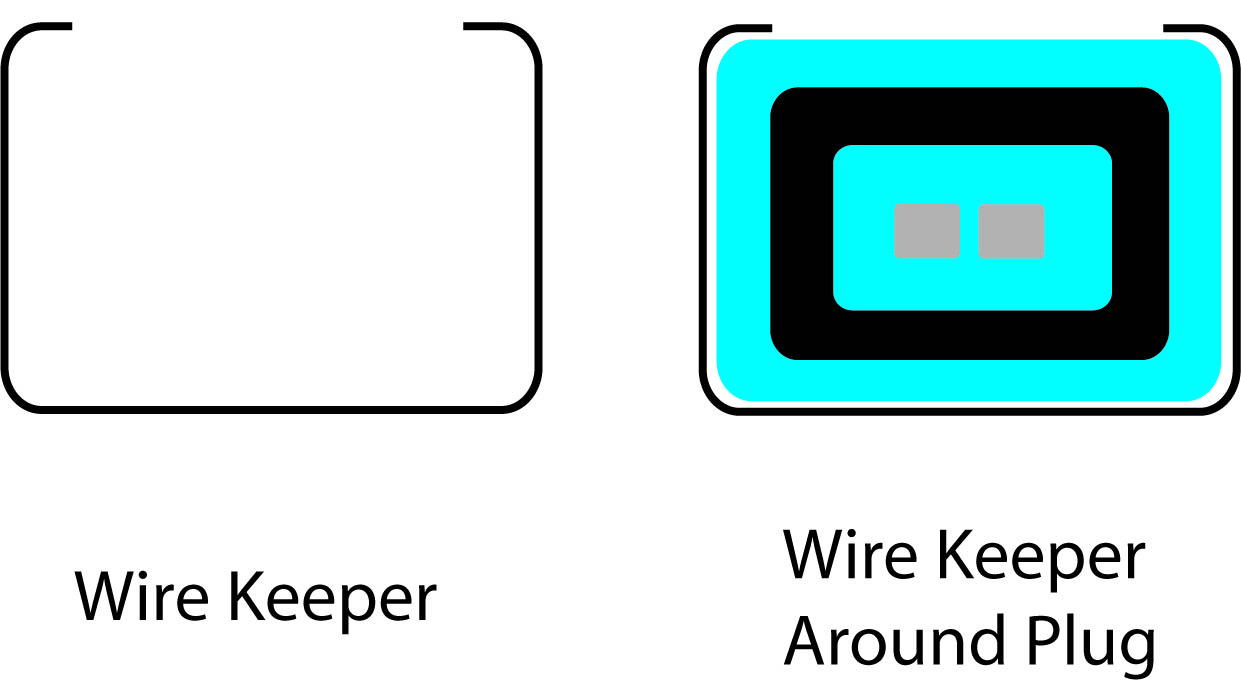 Since my photos of the keeper and plug didn't turn out here's an illustration of what they look like (more or less). The keeper for the injector plugs actually looks like a triangle with one corner pried apart once it is removed. Because the keeper is a simple spring the two ends will actually angle in towards each other somewhat when it is off the plug.
Once you have the plug off you'll see the two metal terminals of the injector. Put your multi-meter on the ohms scale (mine was set on the 20 ohm range) and measure the resistance. If you don't show any reading make sure you have the probes on the terminals as they're quite small. If you still have no reading touch the probes together and you should get nearly zero ohms. This indicates the meter is working and your injector is bad. You could also have a build up of corrosion on your injector terminals and/or your plug. I started having problems a few months ago but every time I would test the injectors they would read fine. Finally the car really started running terrible so I tested the injectors again. They all measured fine but I had trouble getting a reading which I determined was due to the corrosion build up. After cleaning the injector terminals and the plugs the car ran great again. So if the car runs poorly but the injectors measure fine it could be that.
I recently figured out you can also test the injector by applying battery voltage to the injector and listening for a sharp click of the solenoid. I'm not going to recommend that or cover it here because it's more dangerous than just using a meter. You don't want any sparks near your fuel system and it takes some experience with electrical work to do it correctly.
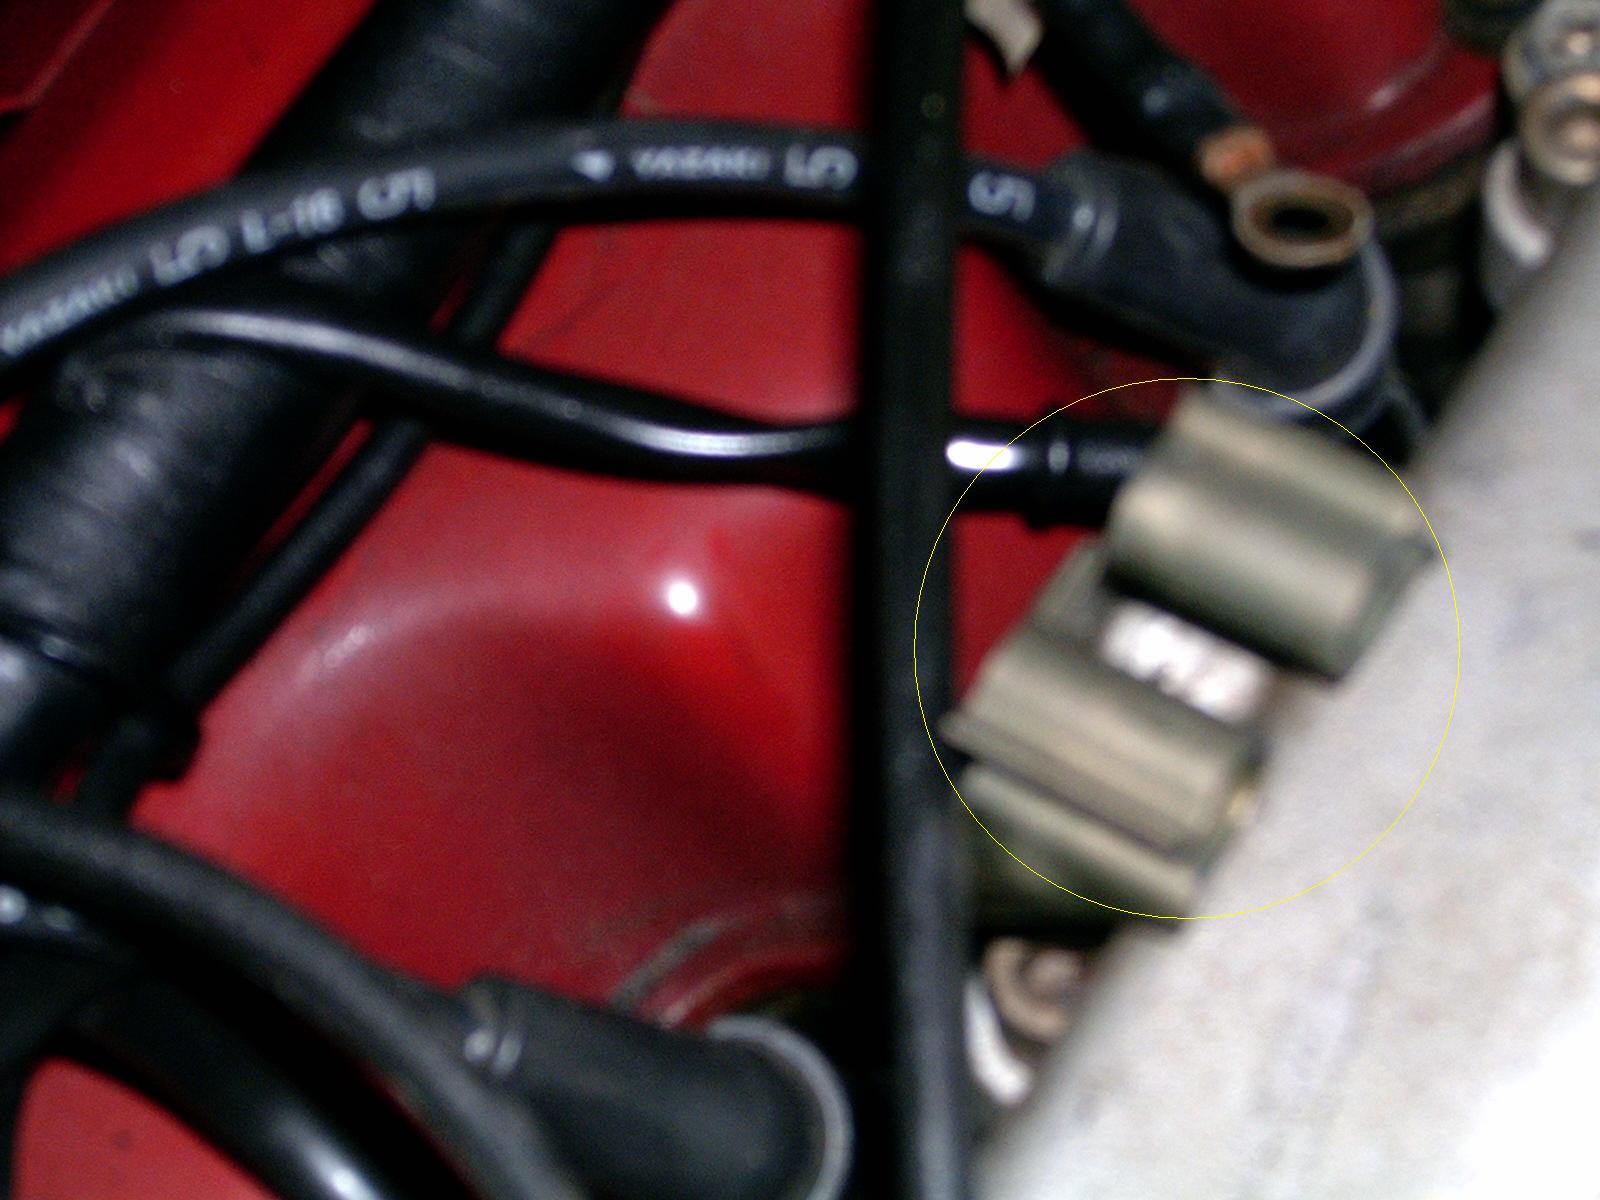
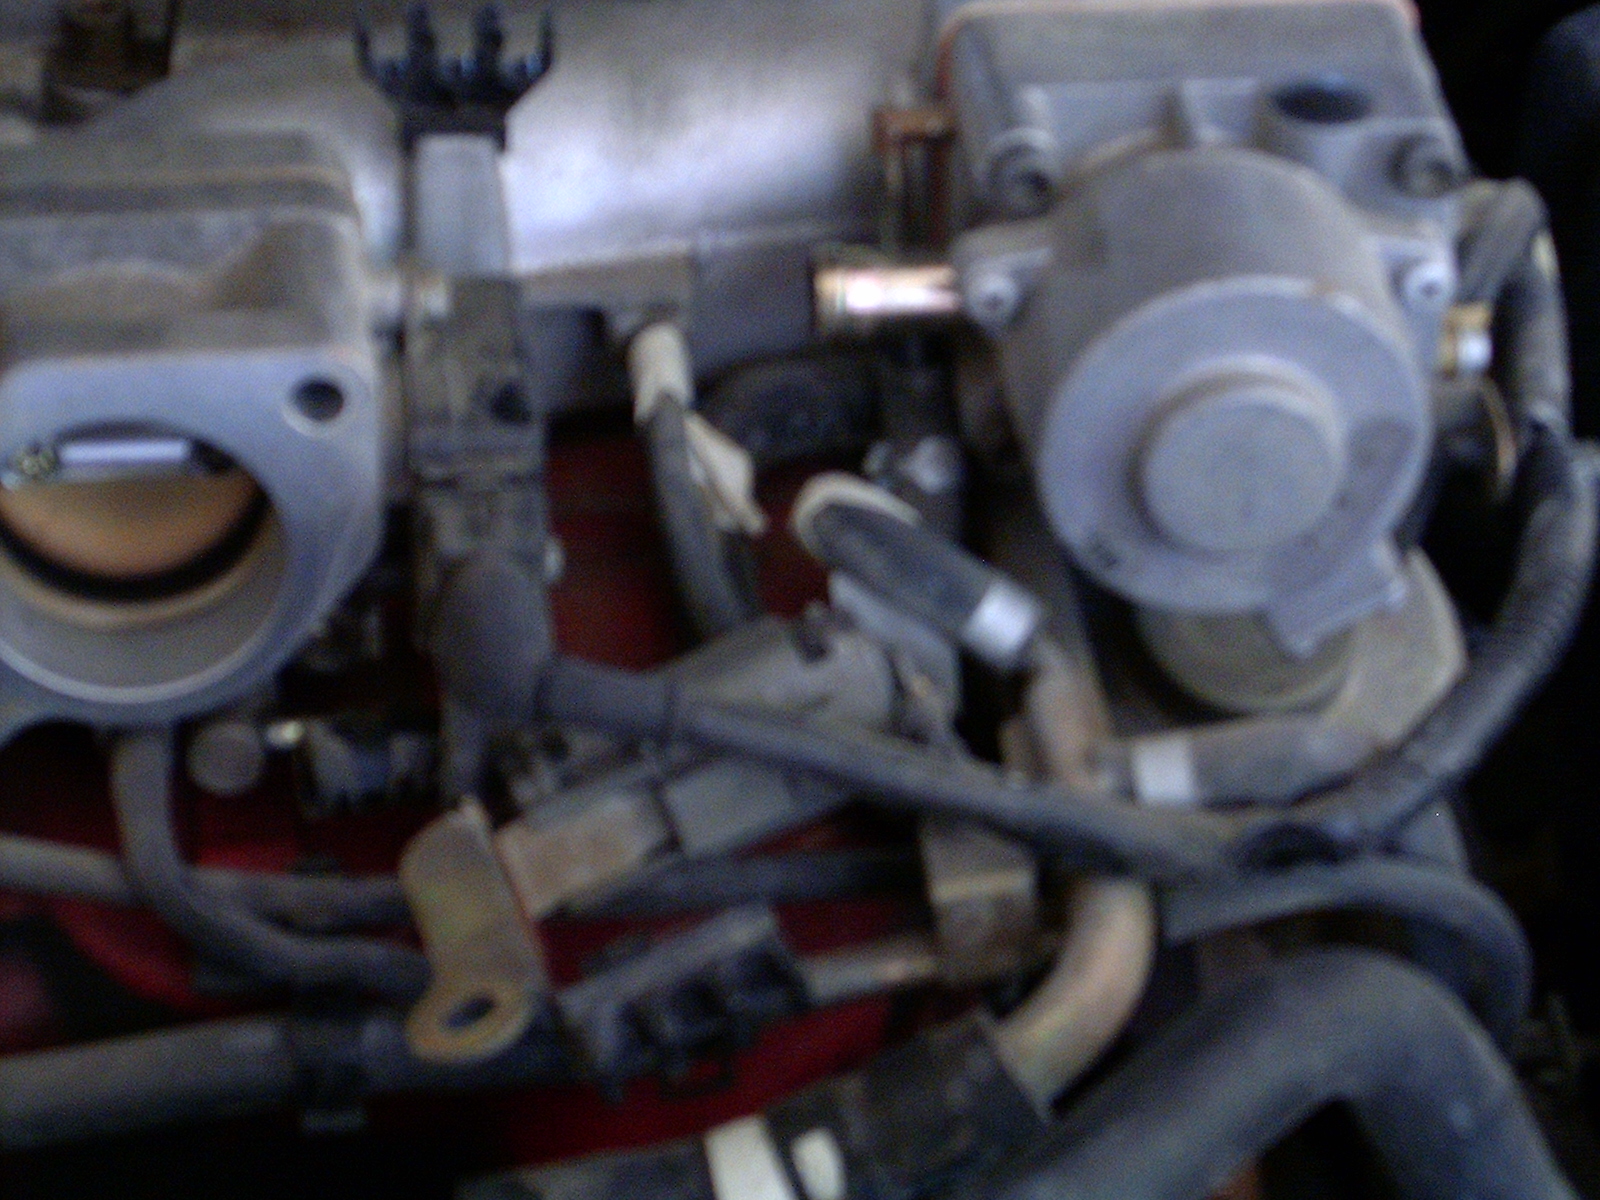
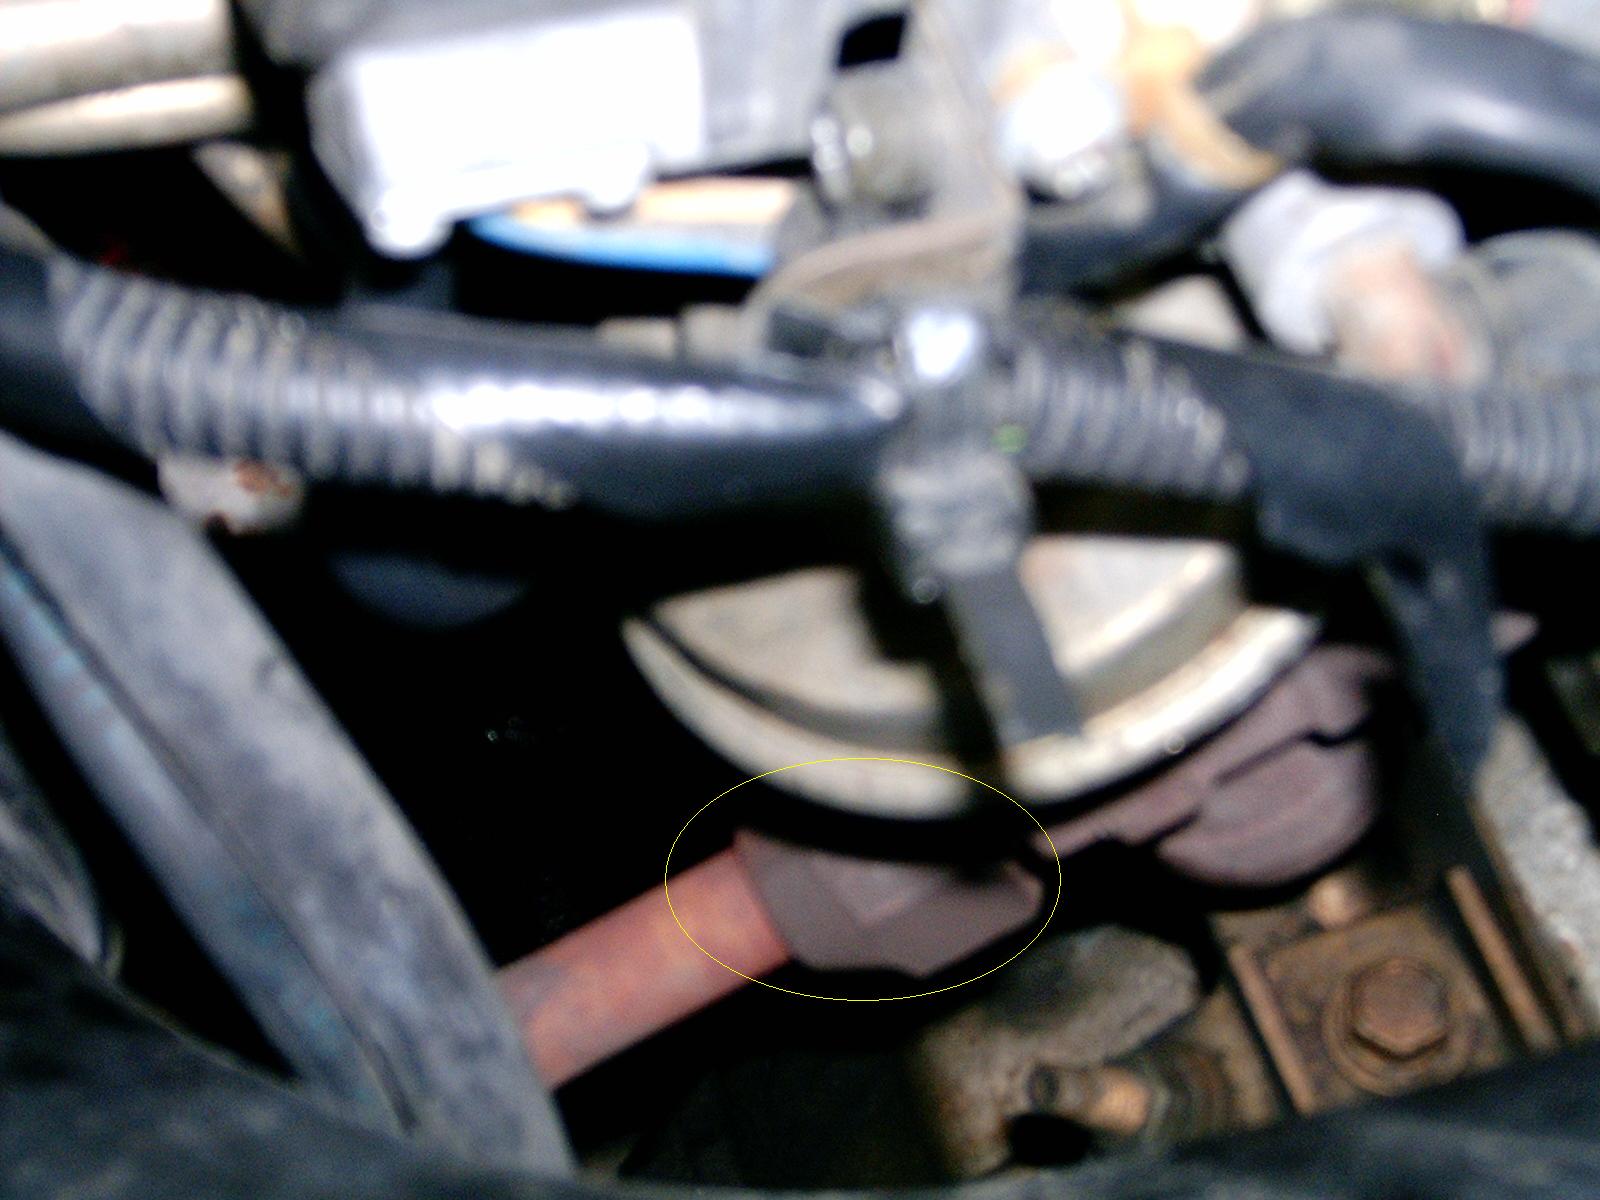
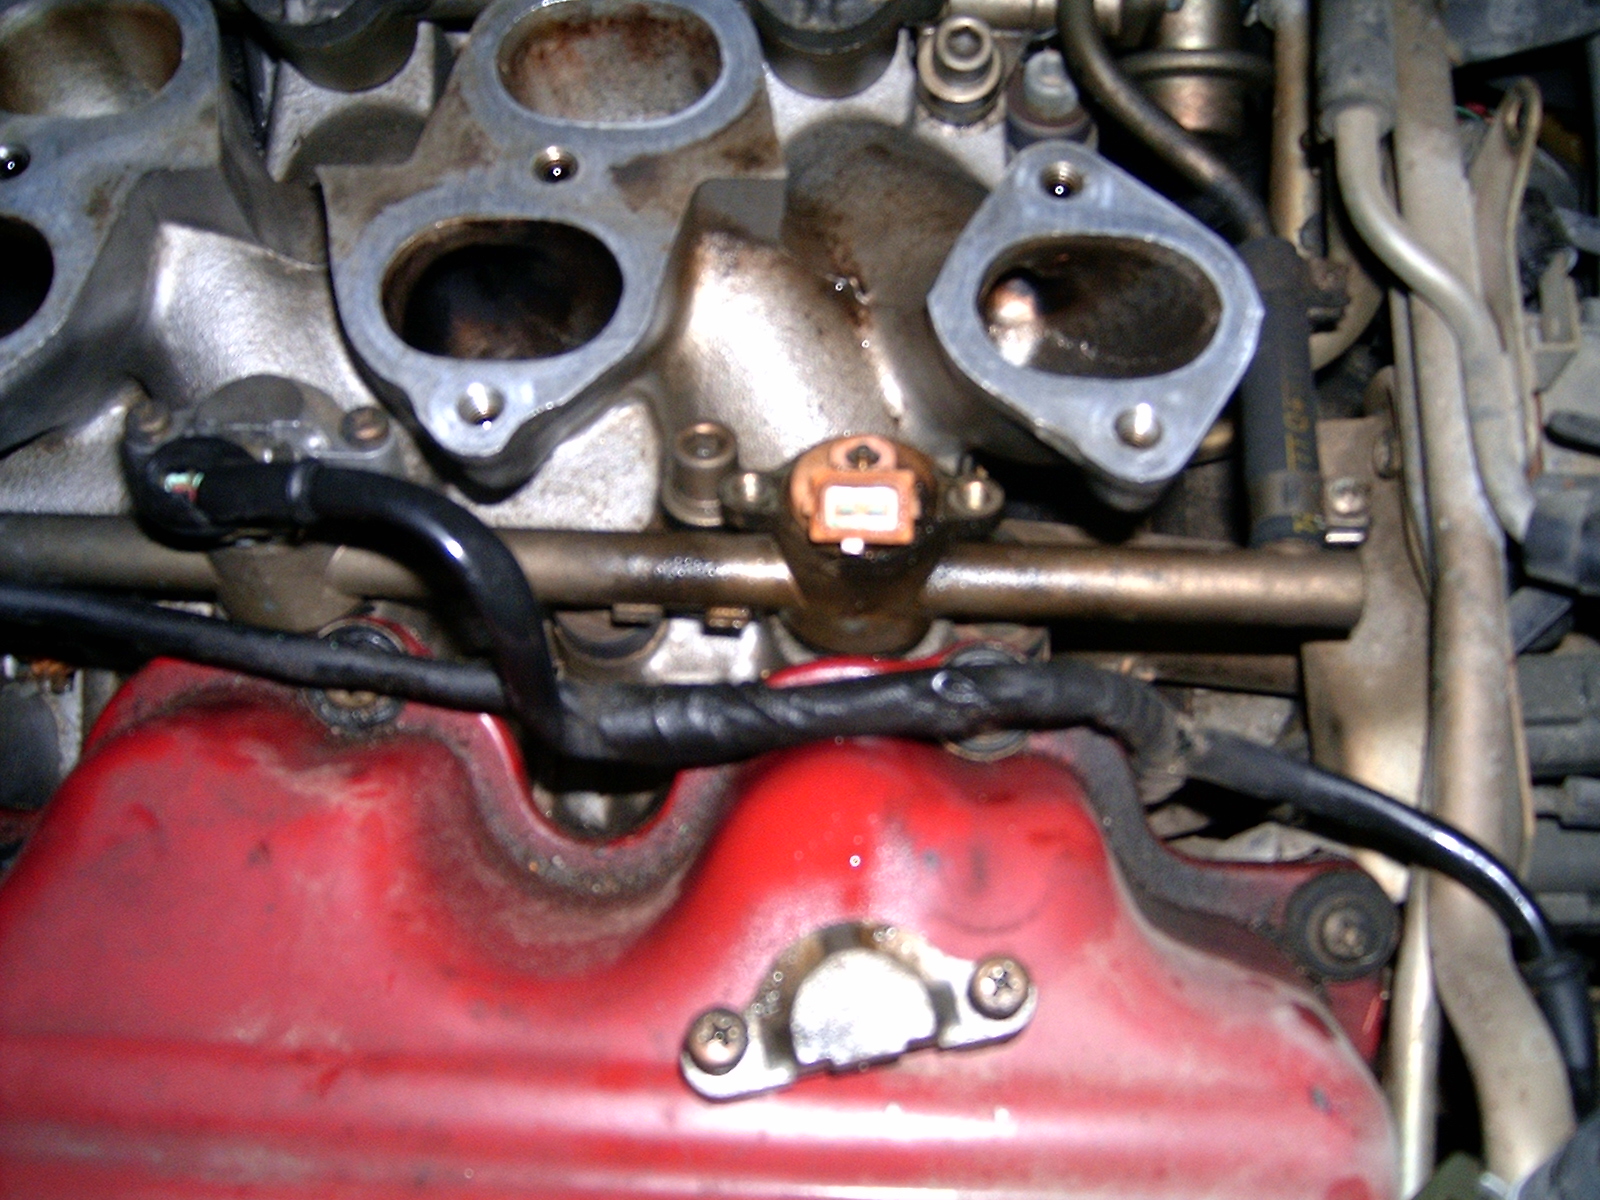
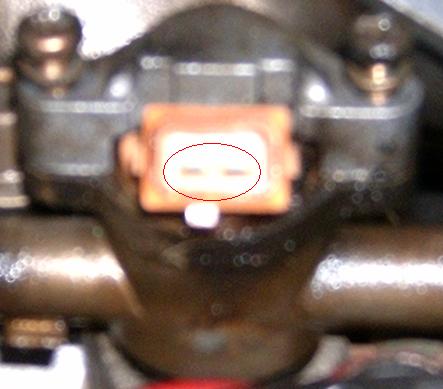 The photo below shows the injector terminals ready for testing (inside the orange area, sorry it's blurry).
Using a flashlight, look on the injector body and you should see a black or blue dot about a quarter of an inch in diameter (for the 89-92 injectors, 93-94 may be green or yellow). I'm told it's important to replace the injector with an injector that has a similar color dot. Mine was black and I replaced it with another black dot injector. Auto parts stores have the less expensive injectors for around $100 and Bosch for around $125. I've used both since I've now done this three times. The injectors I've been buying have no dot but it's the one that is recommended for my car.
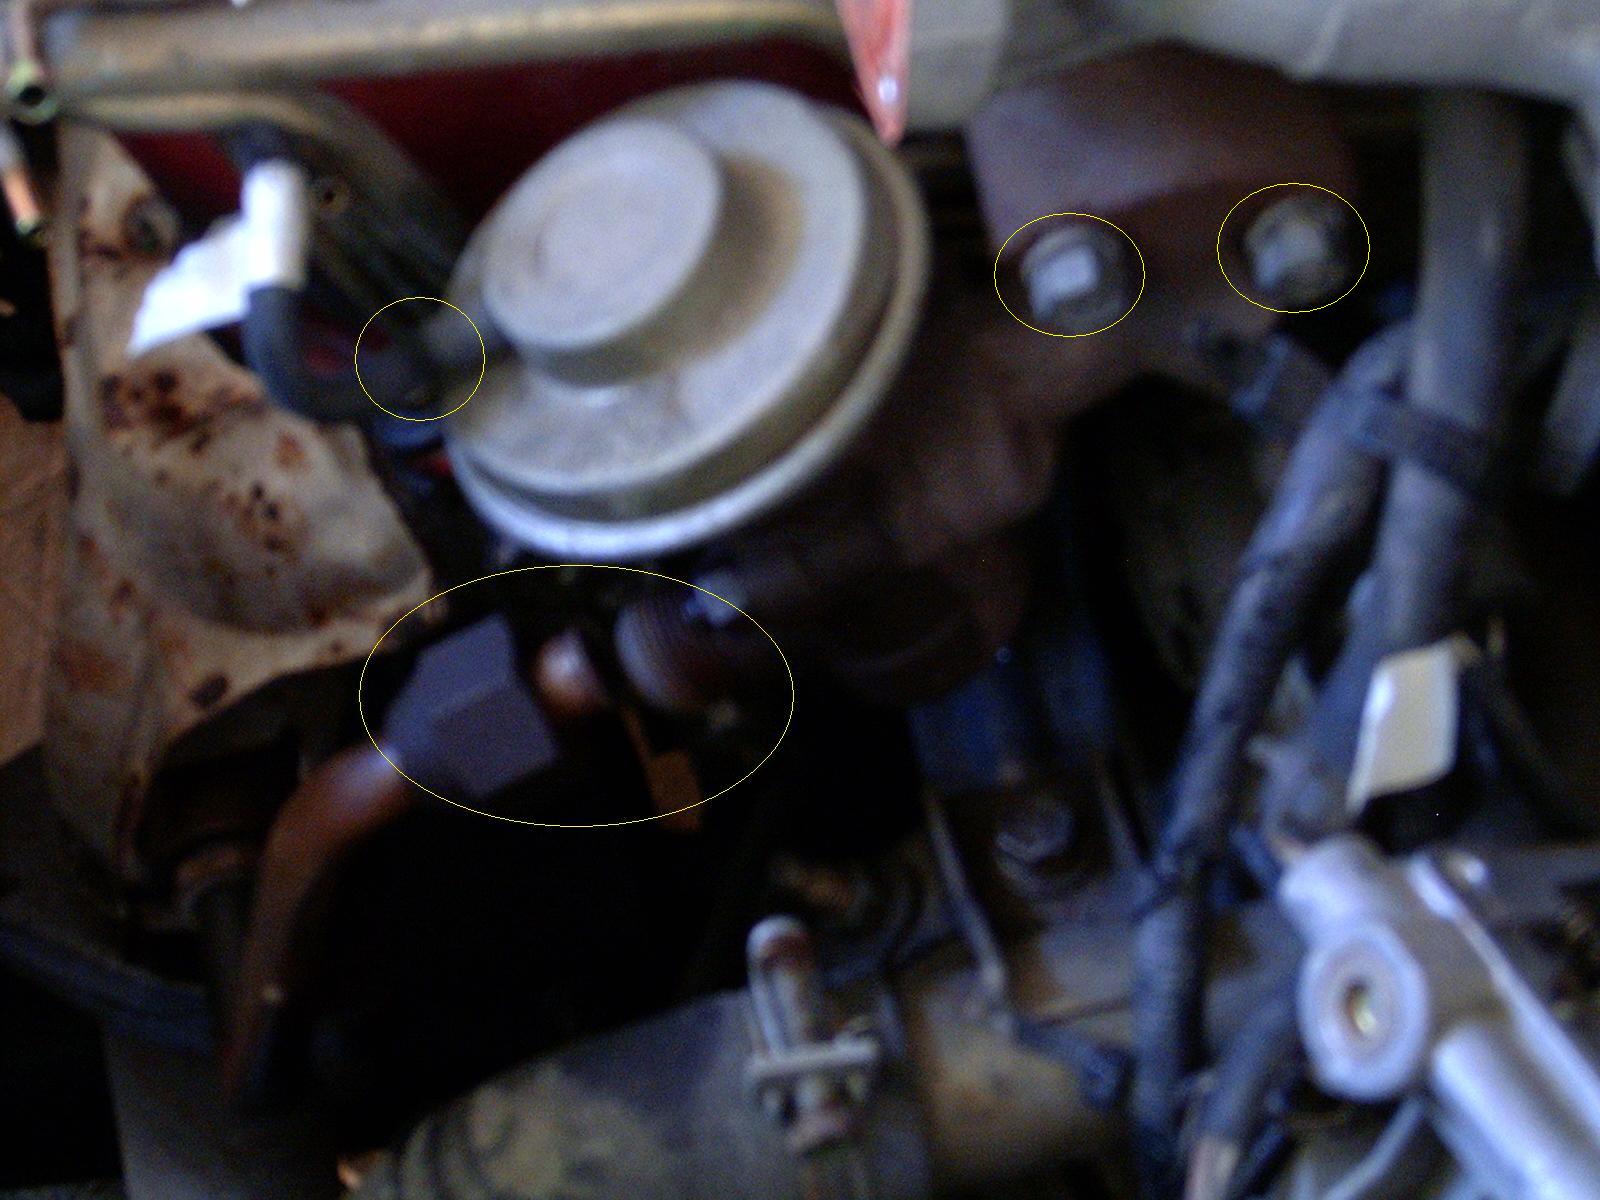
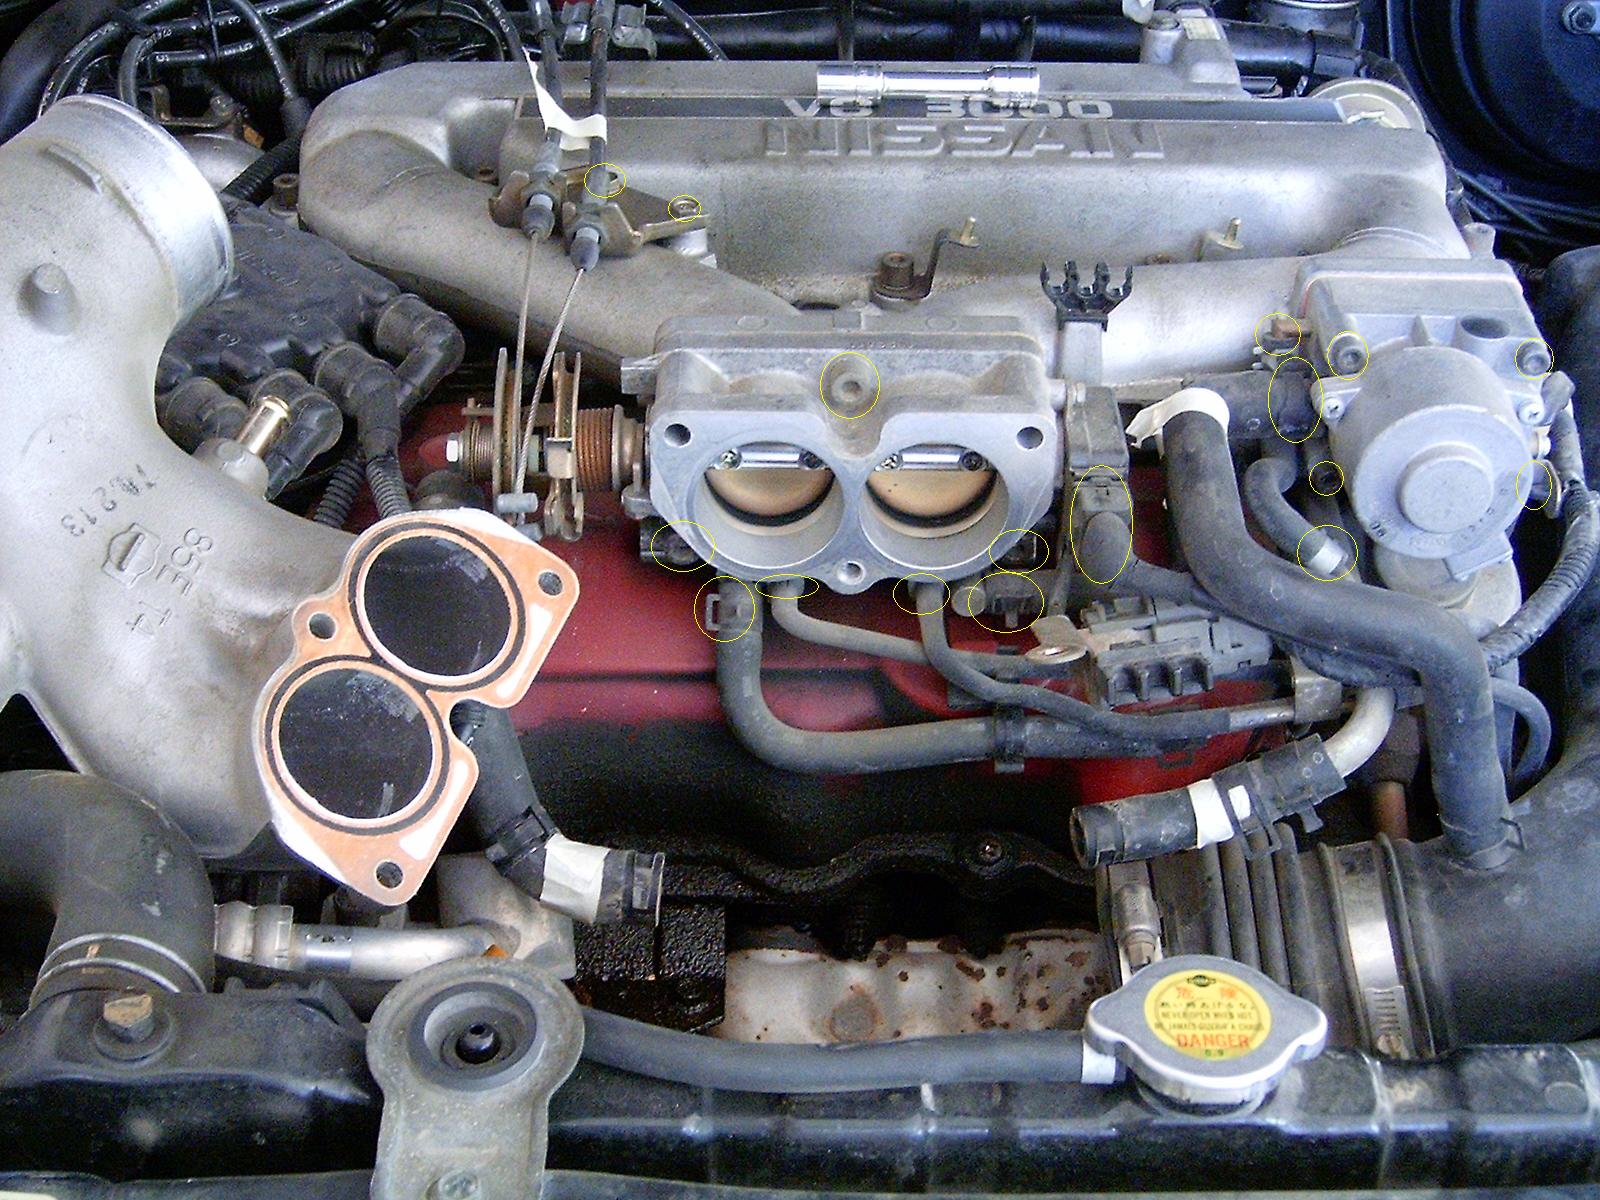
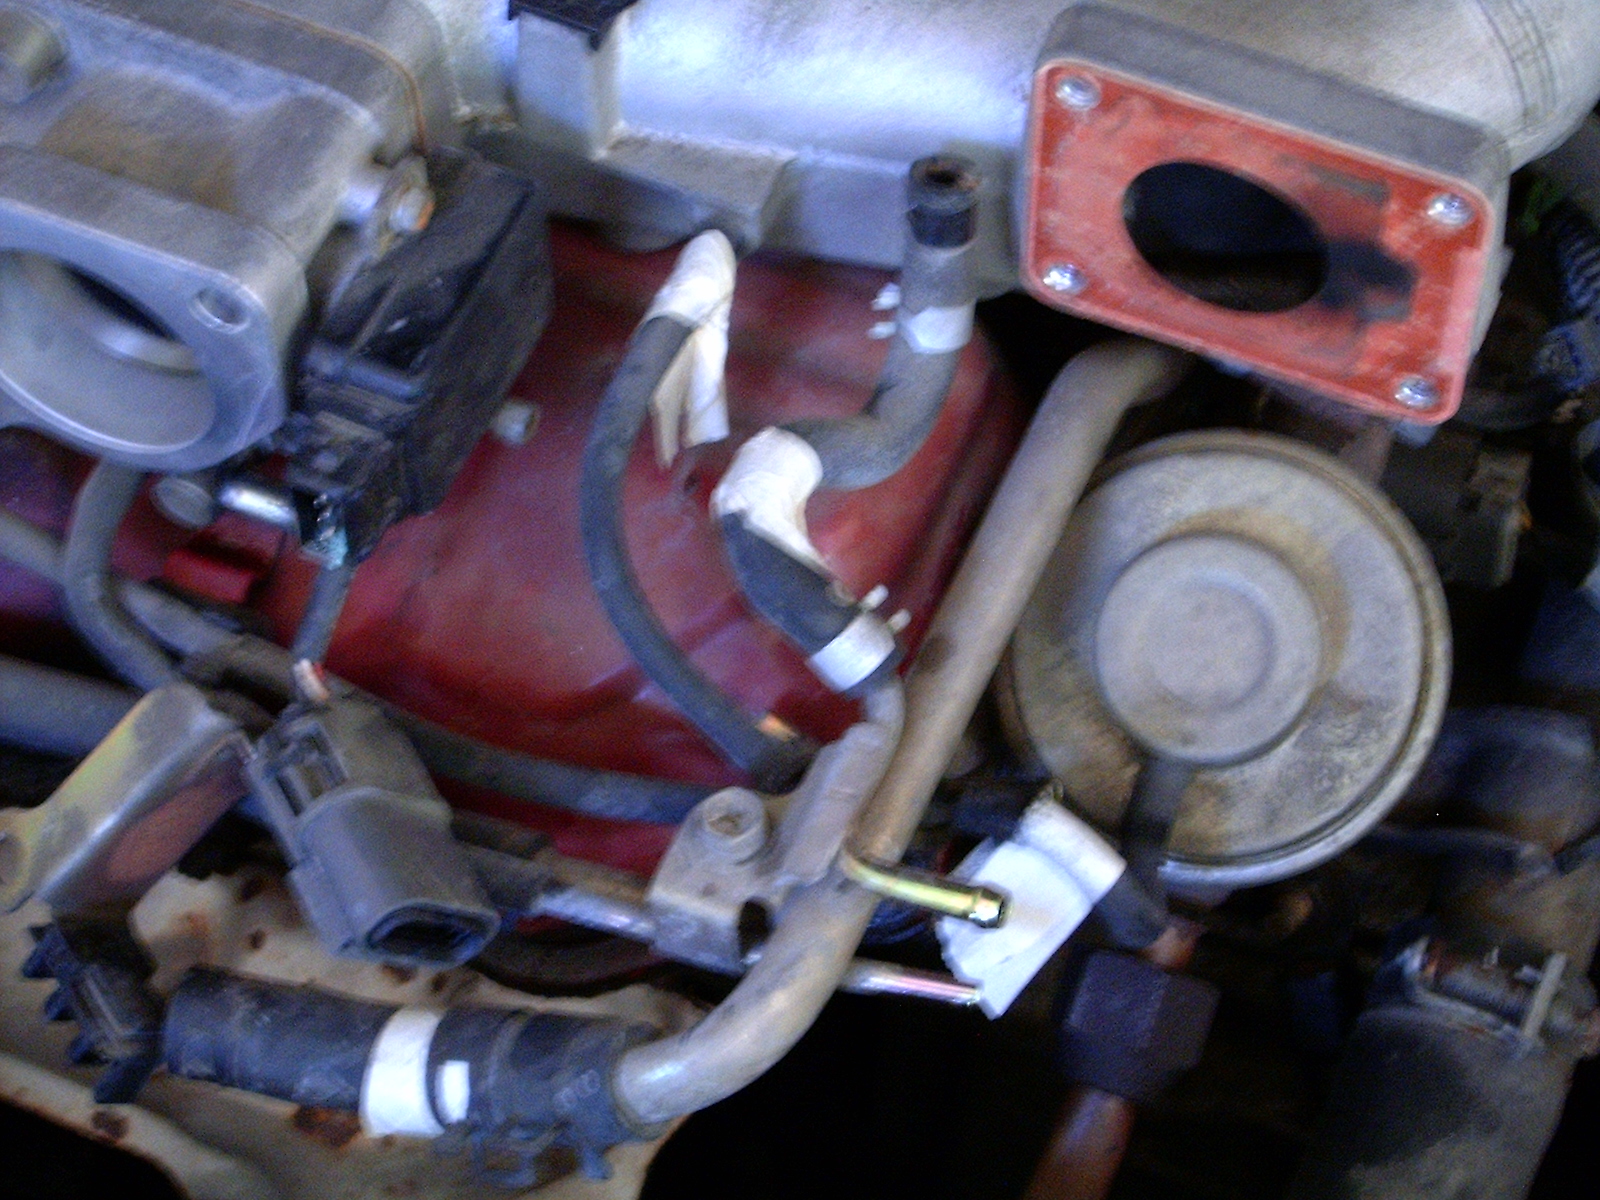
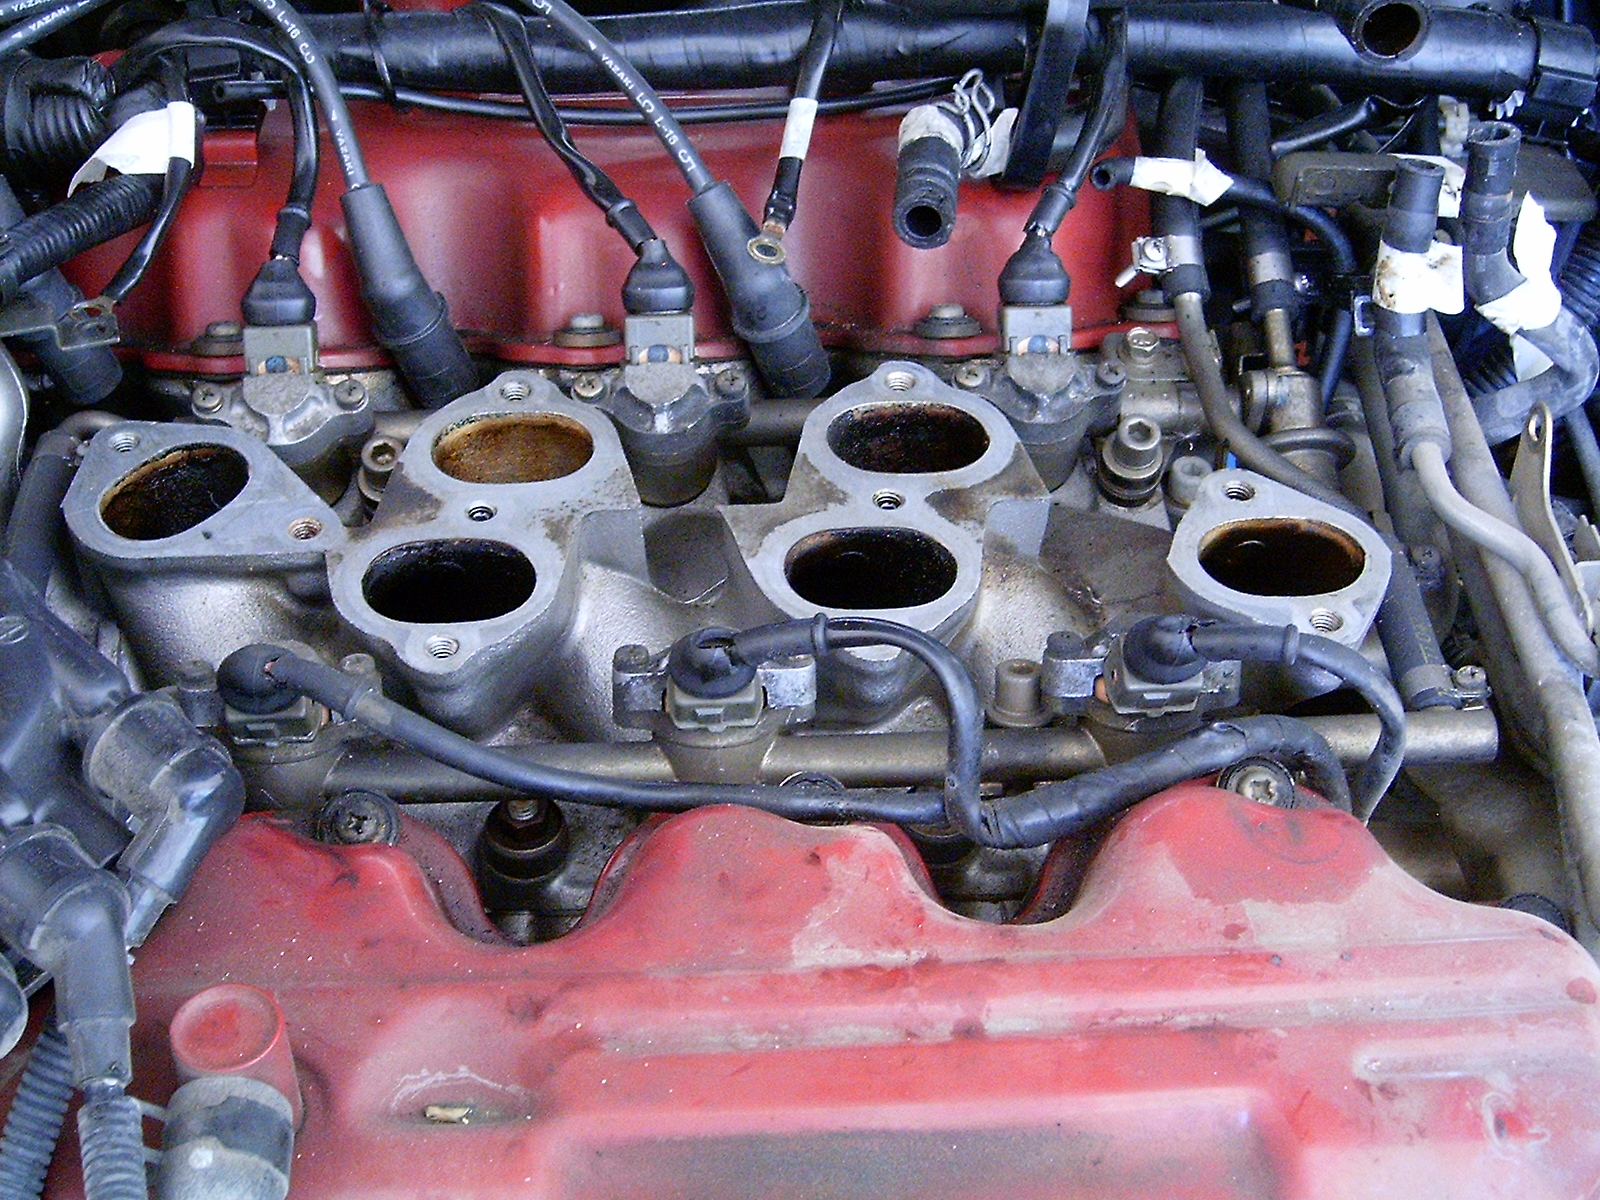
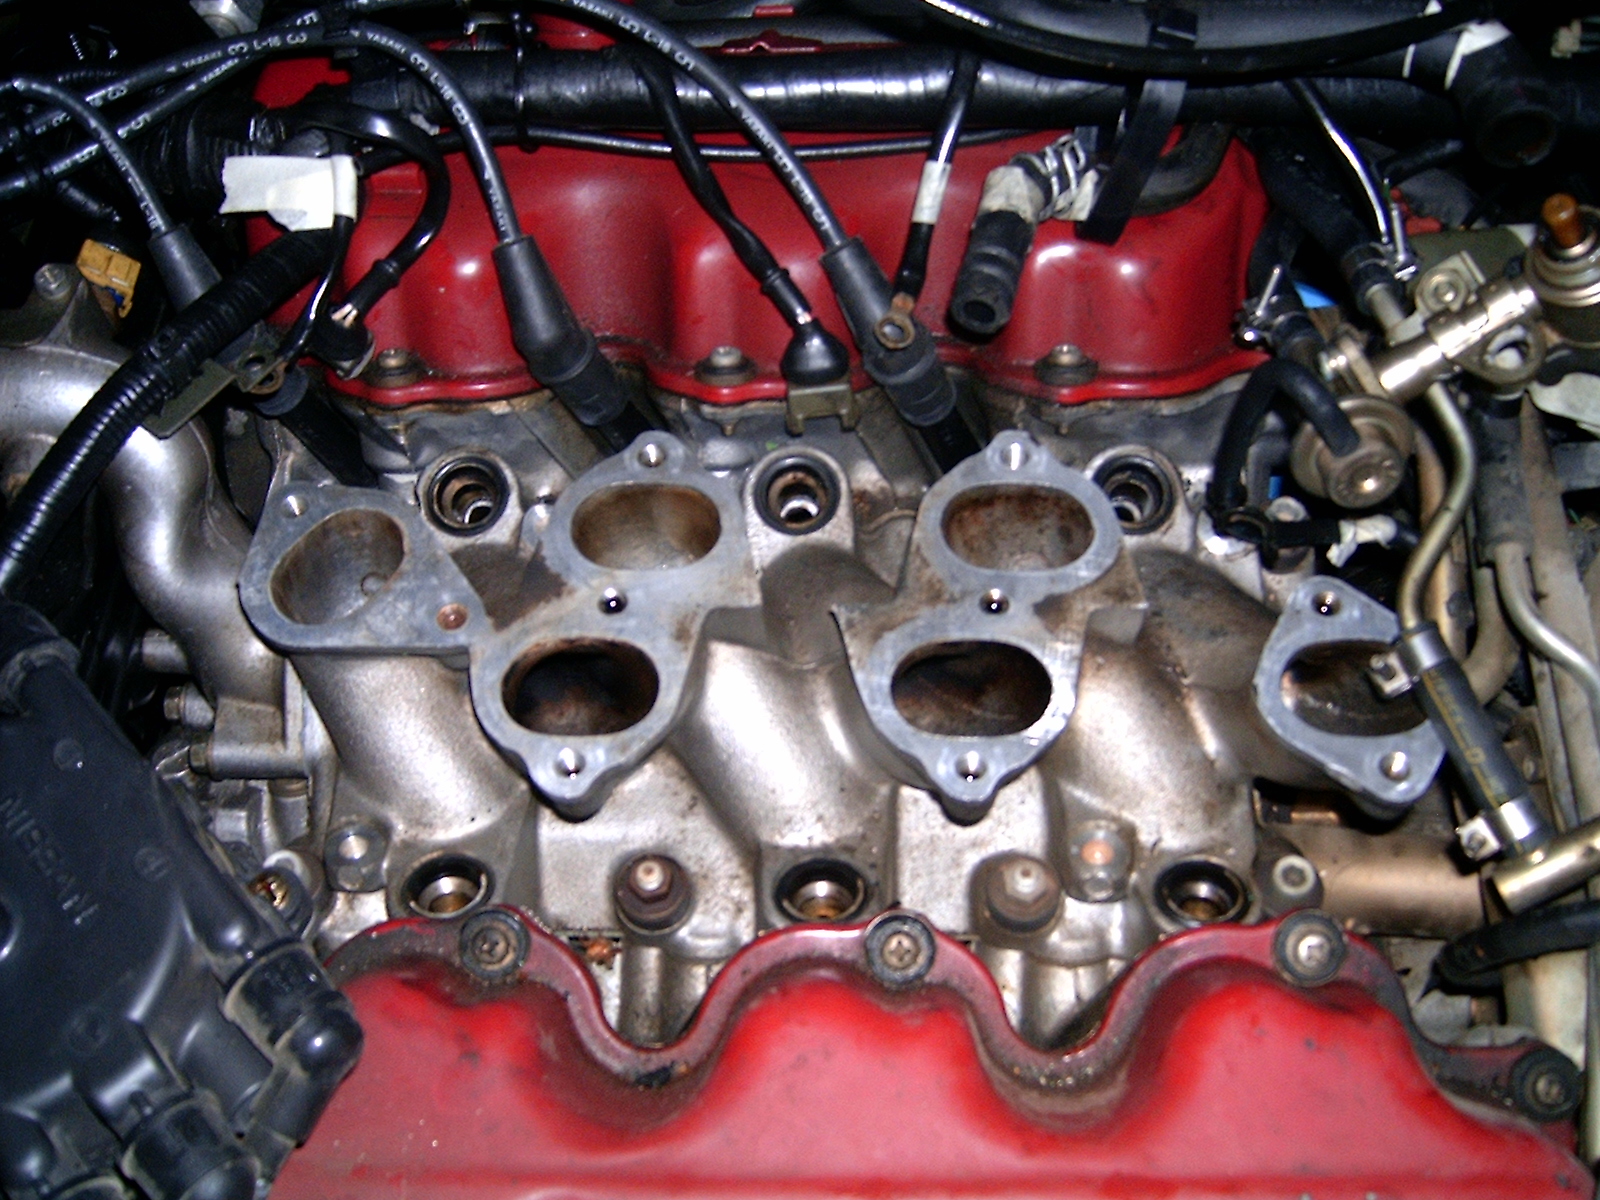
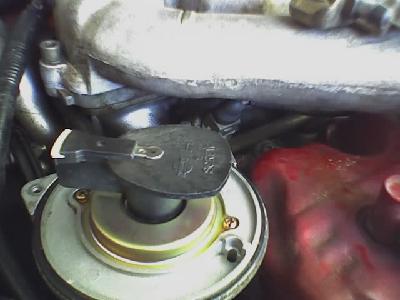 It's tough to get to the front left injector because it is partially covered by the upper intake manifold. However you can pull the rotor cover (the one that says "ECCS") and that should give you enough room to test it. I actually pulled the rotor cap off for even more room which helps a lot. The photo shows it with the rotor cap removed.
While I was doing the actual work I took many photos so that I could create this tutorial for others to use. Nearly all of the smaller photos on this page can be clicked on to open the full resolution photo in another window. I highly recommend viewing the high resolution images so you can see more details. During the process I also cleaned the EGR valve and the throttle chamber in addition to the intake manifolds. I highly recommend doing this this first time you get in to change an injector. It's like changing the water pump when you change the timing belt. While you're in there it's only a little more work plus it makes the car run smoother. When you see the build up of junk I think you'll see why. And I use good gas! Give yourself a good day to complete this job.
If there are any parts that can be improved or if you have any suggestions please let me know.
Other Nissan Maxima Tutorials:
Nissan Maxima Timing Belt Change Tutorial
Nissan Maxima Digital Dash HUD Tutorial
Nissan Maxima Lower Control Arm Bushing Change Tutorial
Disclaimer: Use these directions only as a guide and at your own risk. You're responsible for any damage you do to the vehicle so BE CAREFUL. Your vehicle may in fact have slightly different methods so use common sense if the directions don't match what you see. The demo vehicle being shown is a 1991 Nissan Maxima SE with the VG30E engine.
Parts List
The following list contains all of the parts you will need to get in order to complete the job. My car has the VG30E SOHC while 92-94 Maxima SE models have the VE30DE DOHC. It's important to note that your part numbers may be different depending on your model year, engine type and even the date of manufacture in that year. This list is just a guide and may not be specific to your vehicle.
All of the parts I used were ordered from Courtesy Nissan near Dallas, TX. They're cheaper than the local dealers and they ship quickly. I've linked all of the part numbers to the relevant pages on their site. Again, verify you are looking at the correct part for your vehicle. I'm also adding a column for some similar parts I have used from Autozone.
| Part | Courtesy Part Number | Price - 7/17/2018 (Courtesy Nissan) |
Price - 7/17/2018 AutoZone |
| IACV AAC gasket | 23785-J30002 |
$5.18 |
|
| O-Ring (goes into the fuel rail, comes with a new injector) | 16618-J30003 |
$3.36 | |
| O-Ring (goes around the fuel injector base, comes with a new injector) | 16618-J30005 | $2.29 | |
| Injector insulator (6 total needed) | 16635-J30003 | $4.54 (6 needed) | $9.99 (6 included in set) |
| Upper Intake Manifold gasket | 14033-J30003 | $14.03 | $15.99 (upper and lower) |
| Lower Intake Manifold gasket | 14032-J30003 | $13.95 | see above |
| Outer Throttle Chamber gasket | 16175-J30004 | $15.41 | |
| Inner Throttle Chamber gasket | 16175-J30003 | $6.23 | |
| EGR Valve gasket | 14719-J30003 | $3.79 | $1.99 |
| Fuel Injector (mine had the "black dot") | 16600-J30010 | $138.99 | $98.95 (GP Sorensen) |
| Throttle Body Cleaner (at least two cans) | $5.99 (each can) |
Tools needed
- Small flat screwdriver ("eyeglass" type) for removing the wire keepers (I use a metal pick tool)
- Large and small socket wrench with extensions
- 1/4" socket, screwdriver extension (1/4" end), #2 Phillips bit (these are used to remove the injector caps from the fuel rail)
- 8mm socket
- 10mm socket
- 12mm socket
- 5mm Allen head wrench (for tighter spaces)
- 5mm Allen head socket (necessary for accurate torque tightening)
- 6mm Allen head socket (necessary for accurate torque tightening)
- Pliers (for removing hose clamps)
- Phillips head screwdriver (for removing hose clamps and fuel injector caps)
- Torque wrench
- Adjustable end wrench (for the EGR flare tube)
- Masking tape for marking wires/hoses for removal (I switched to blue or green tape after using tan for this tutorial)
- 5/32" rubber hose (this is to replace old/brittle/ripped vacuum hoses, I needed about three feet total)
- WD-40, PB Blaster or similar for loosening bolts
- toothbrush (for cleaning)
- paper towels (for cleaning up the cleaning)
- razor blade scraper (for removing gaskets)
- Dremel tool with wire brush attachment (recommended for removing the throttle body outer gasket and cleaning injectors)
Vehicle prep
- Start the engine
- Relieve pressure on the fuel system by pulling the fuel pump fuse. The engine will die. Ensure the fuel pressure is relieved by cranking the engine and ensuring it does not start. Remove the keys from the vehicle.
- Disconnect the negative battery terminal (10mm bolt)
- Remove the spark plug wires from the front three spark plugs and the three slot plastic plug wire keepers. Move them so they do not interfere with the rest of the process. The back three spark plug wires can stay.
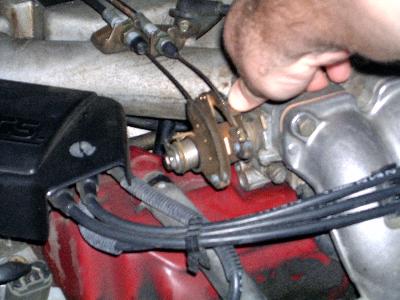
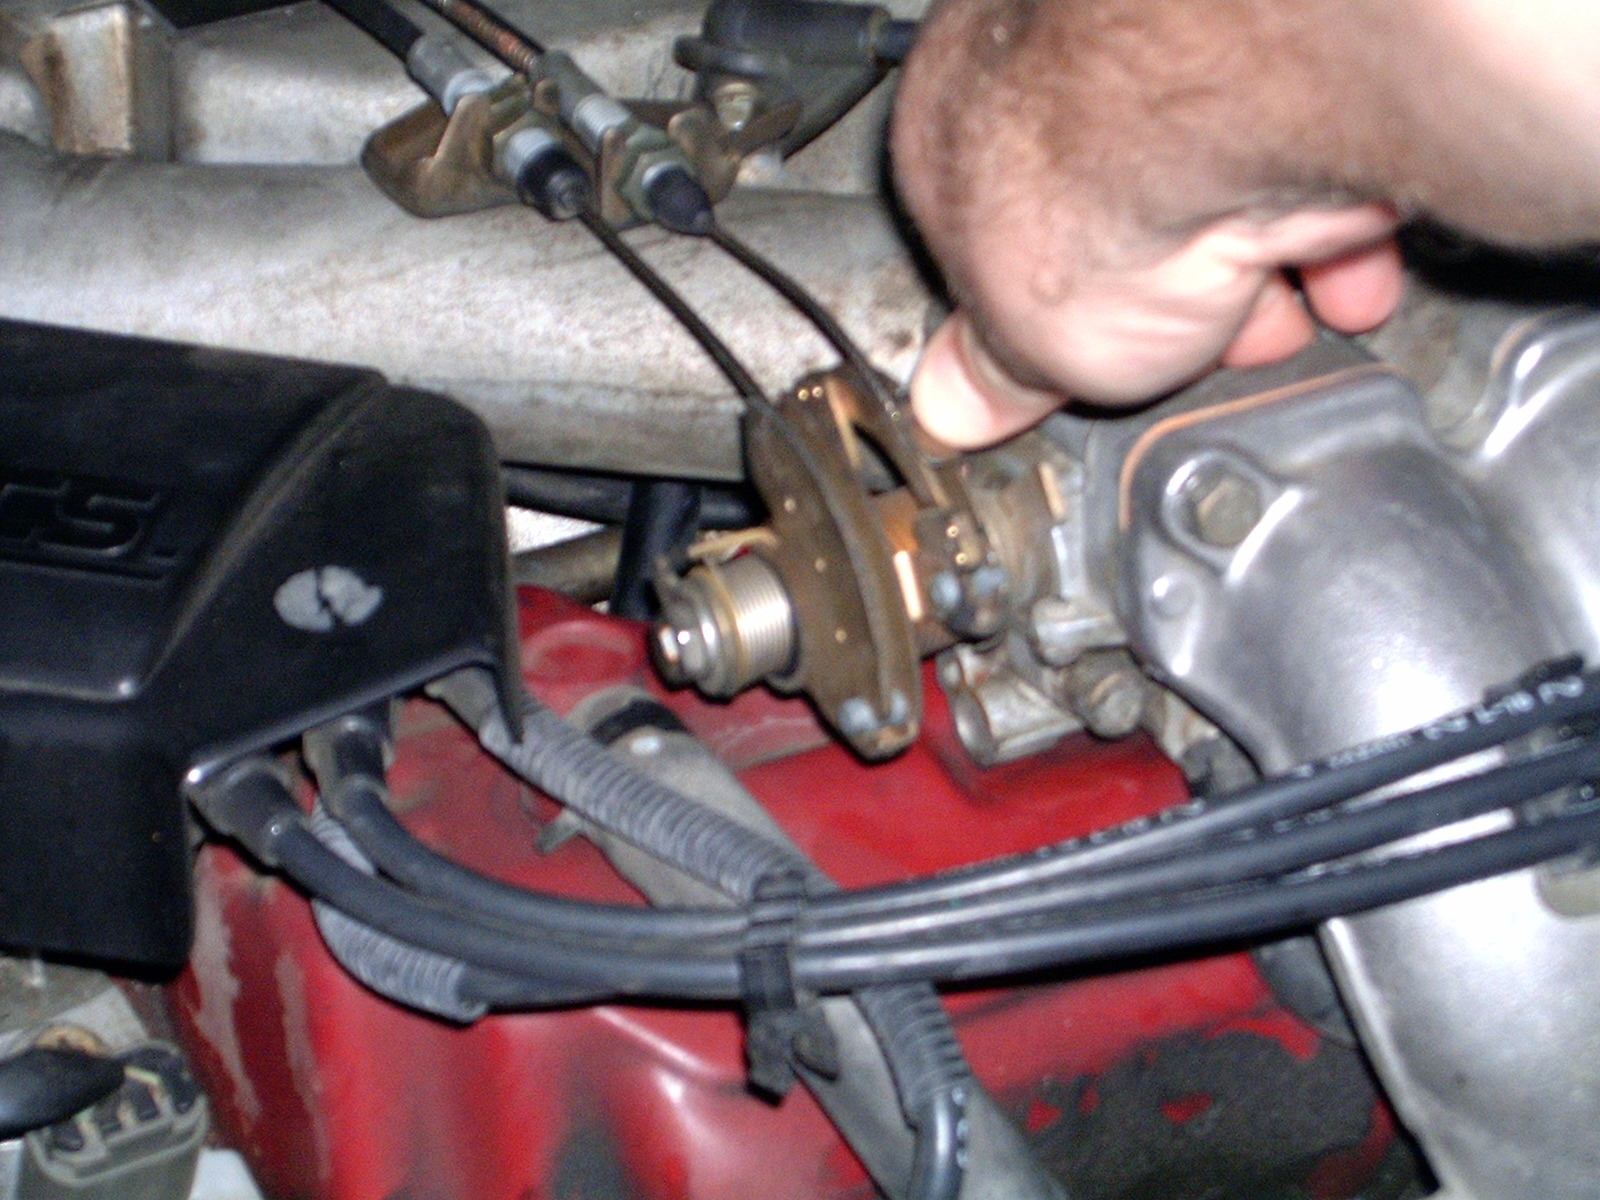
 Remove the accelerator cables from the throttle body. Pull the metal quarter moon sections that control the butterfly valves back towards the firewall. This will allow you to slip the throttle cables out of those sections. Then pop the cables out of the black plastic keeper on the rear of the intake plenum. Now use a 10mm socket/wrench and unbolt the throttle cable bracket from the intake plenum. This will completely free the cables from the plenum. Push them back and out of the way
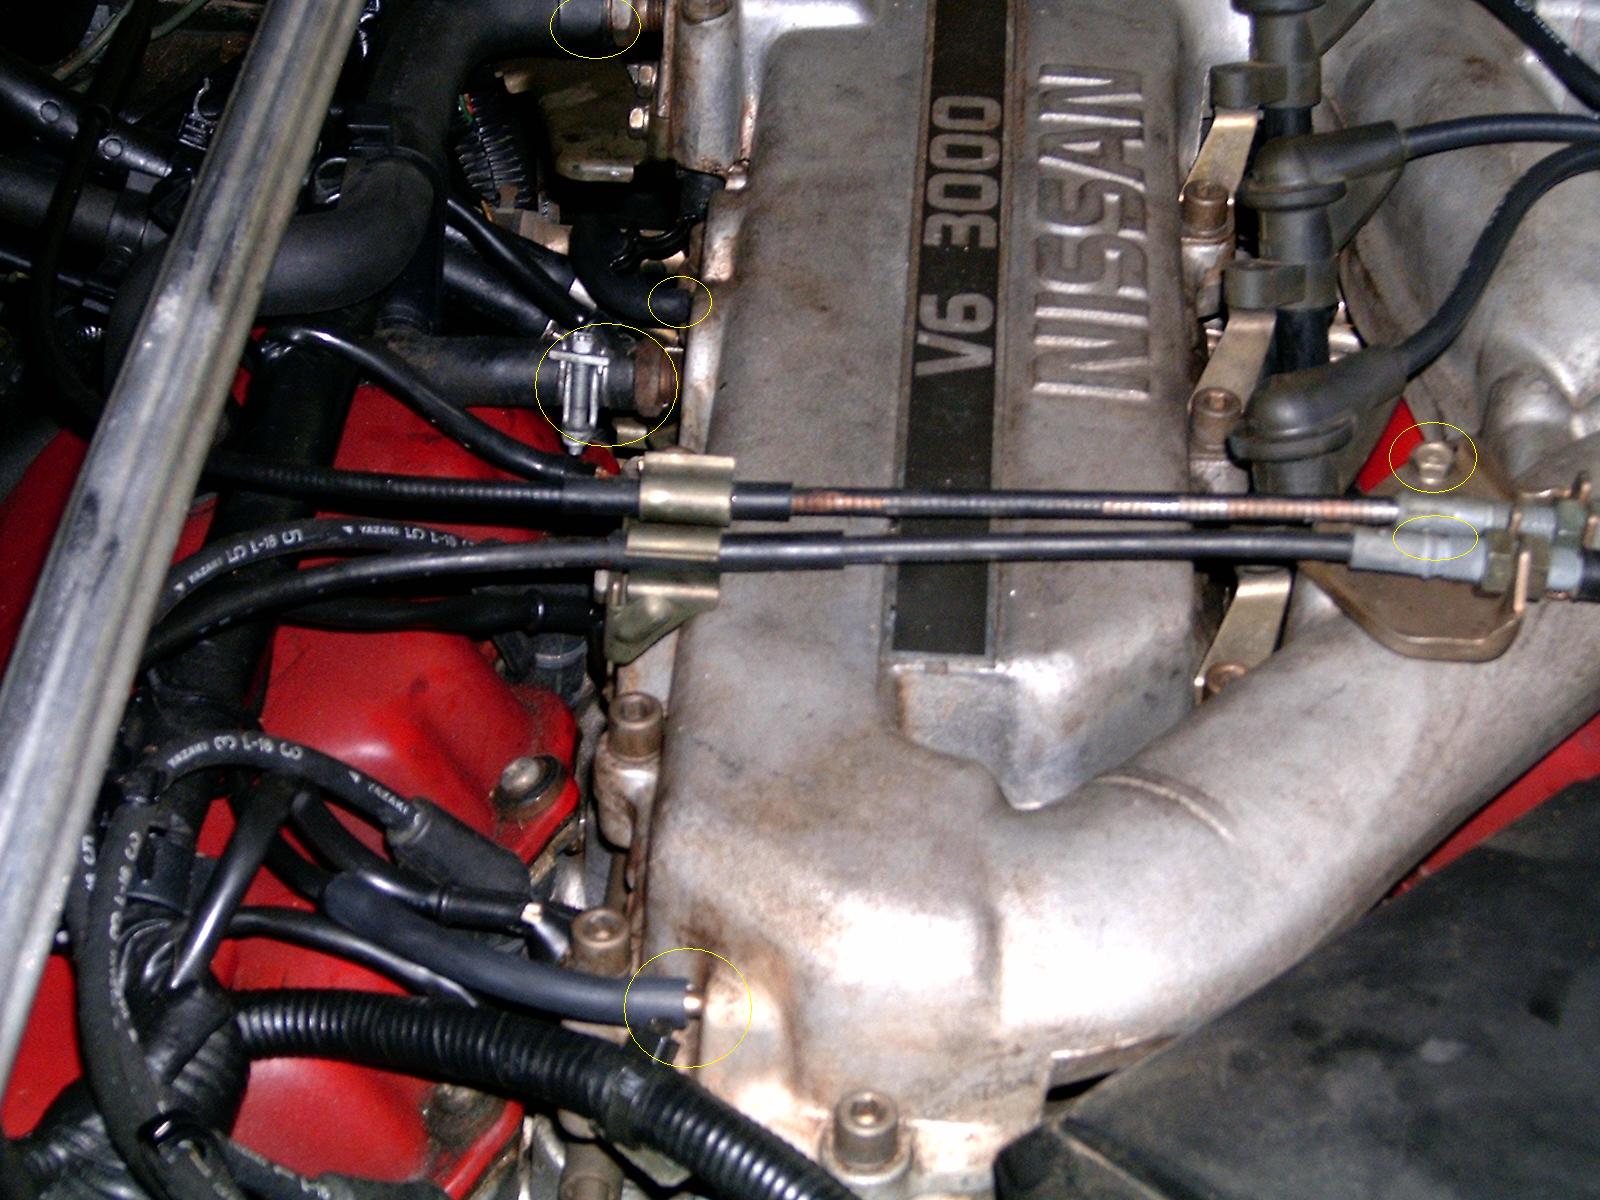
- You will need to remove many hoses and wires in this process. Use masking tape to mark all of the hoses and wires you anticipate needing to remove. I can't recommend this enough. Many hoses become almost hidden (black hoses in a dark engine compartment) after removal and you don't want to have a disconnected vacuum hose and then wonder why the car doesn't run right. Take the time now and mark everything you think will be removed in order to take off the following.
If you aren't cleaning the EGR valve or throttle chamber then you only need to take off enough hoses that you can push the upper plenum/manifold assembly to the right side of the engine compartment (driver's side). I can't tell you which those are but if you can see that a hose only connects between two things on the upper manifold you don't need to take it off. Use caution when moving the plenum to make sure you did get everything.
- Intake elbow between the air cleaner and the throttle body (large hoses, easy to see)
- IACV-AAC valve (three hoses)
- EGR valve (one hose plus the flare tube)
- Intake plenum (many hoses all around it plus two ground wires on the backside)
- Throttle position sensor (on the right of the throttle chamber, it remains but the electrical plugs will need to be taken off)


- Remove the intake elbow that connects the air cleaner piping to the throttle body (only if you are cleaning the throttle body, otherwise just the elbow from the air cleaner piping). Use a pair of pliers to loosen the spring type hose clamps (move them further up the hose where they won't interfere) and then slide the hoses off the elbow. This is easier said then done. I twisted the hoses back and forth while pulling to get them off. I also used a wide panel tool to help pry the hoses off initially. I would recommend against using pliers to grab any hoses since they will tear up these old and fragile hoses. I ended up having to replace the "S" shaped cooling hose connecting the AAC valve to the plenum because I put a pinhole in it. Back to the removal, there are three 12mm bolts and the middle one holds on the spark plug wire keeper. Note that the top right bolt also holds in a metal bracket for a wiring plug. Don't forget this on the reinstallation.
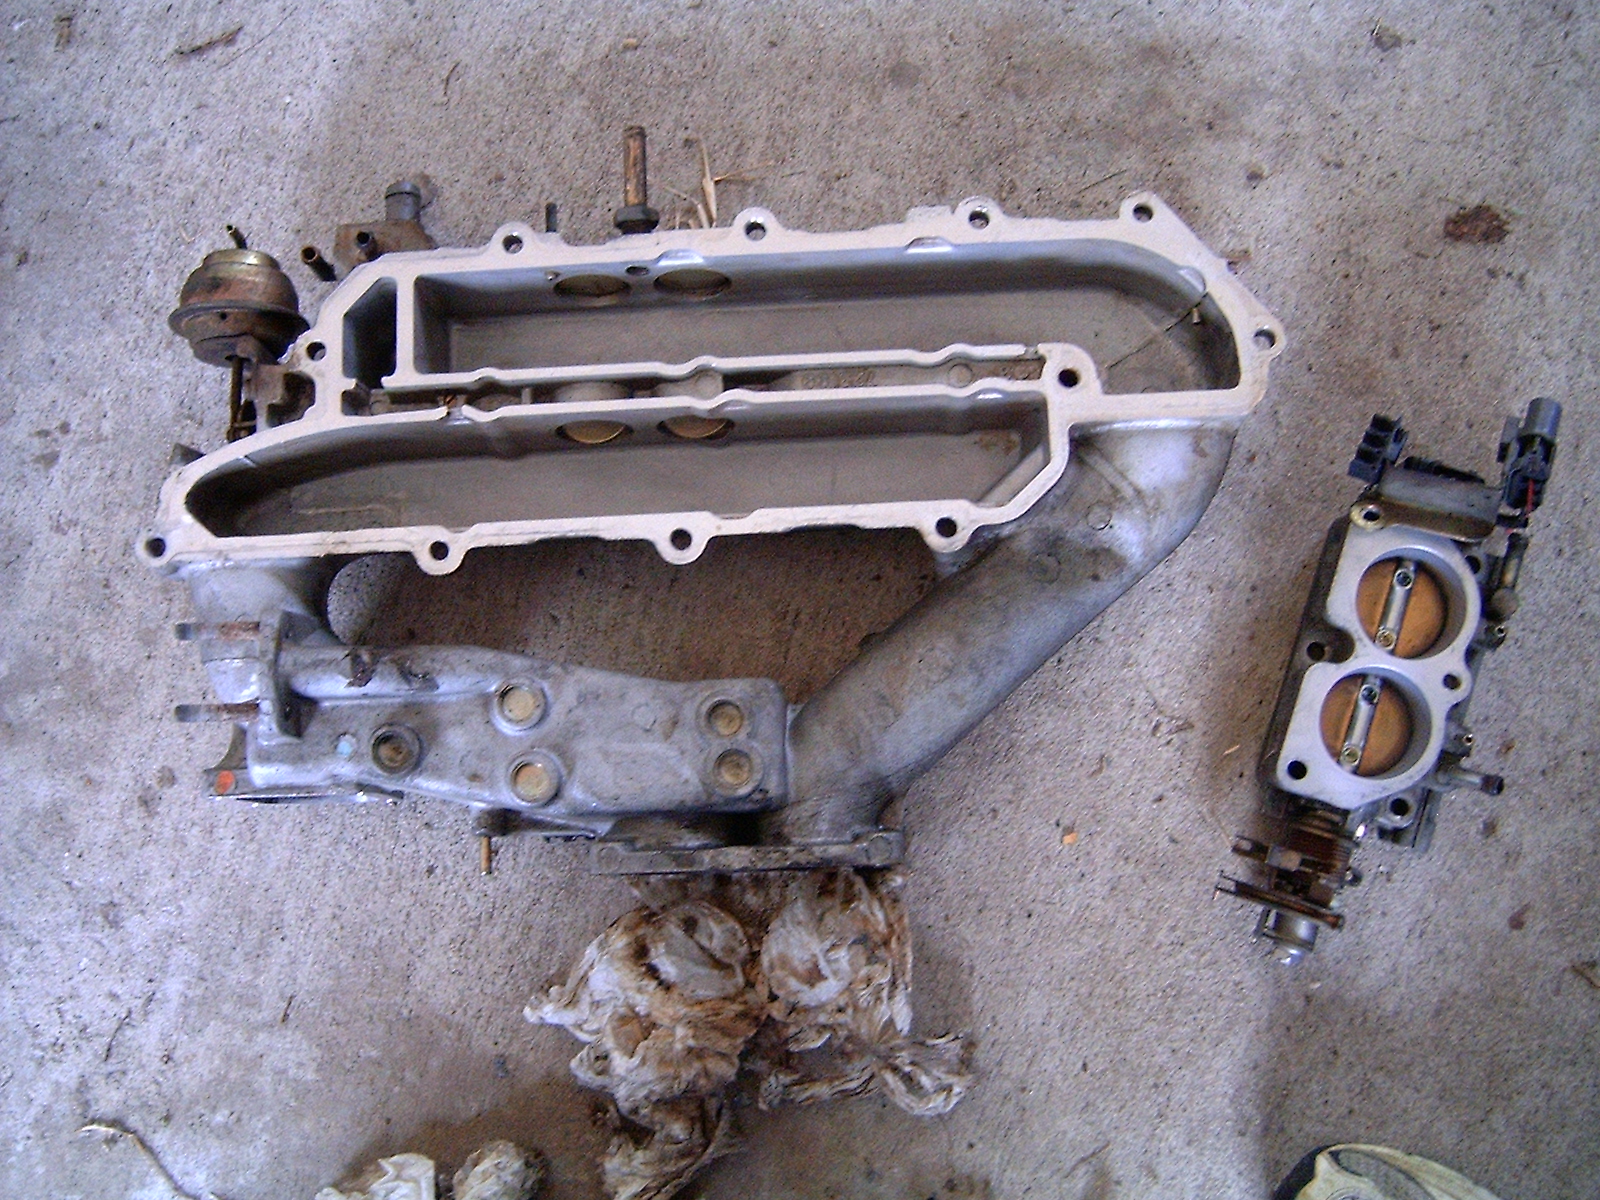
- Remove the throttle body chamber from the intake plenum with the 6mm Allen head bolts. (It is not necessary to remove the intake elbow from the throttle body or the throttle body from the throttle chamber if you are only replacing the injector. This eliminates the need to replace both throttle body gaskets.)
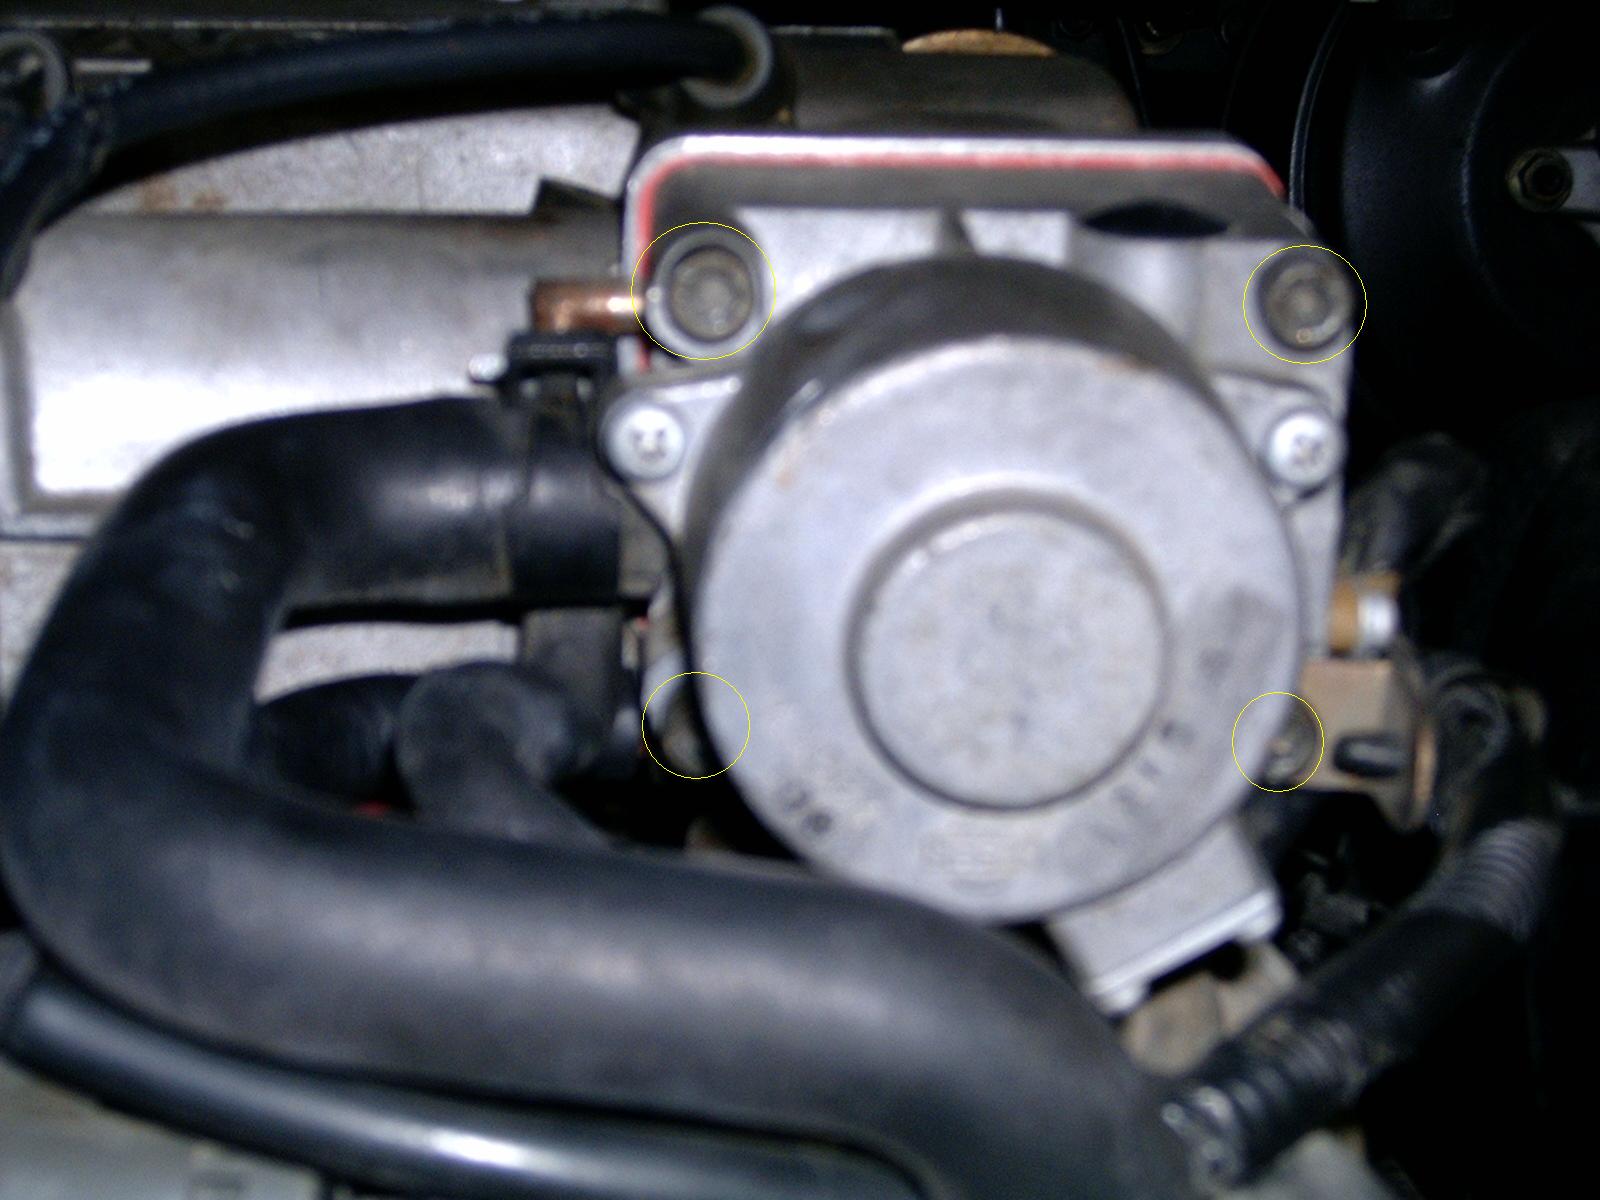
- Disconnect the IACV AAC valve (not required for just an injector replacement) by first removing the three hoses that connect to it. Then remove the four 5mm Allen head bolts around the perimeter of the valve body. You can use an Allen wrench or an Allen socket but eventually you will need to use an Allen socket when you torque the bolts back on. To remove the bottom left bolt I had to use a wrench since my socket was too fat to fit in that space.
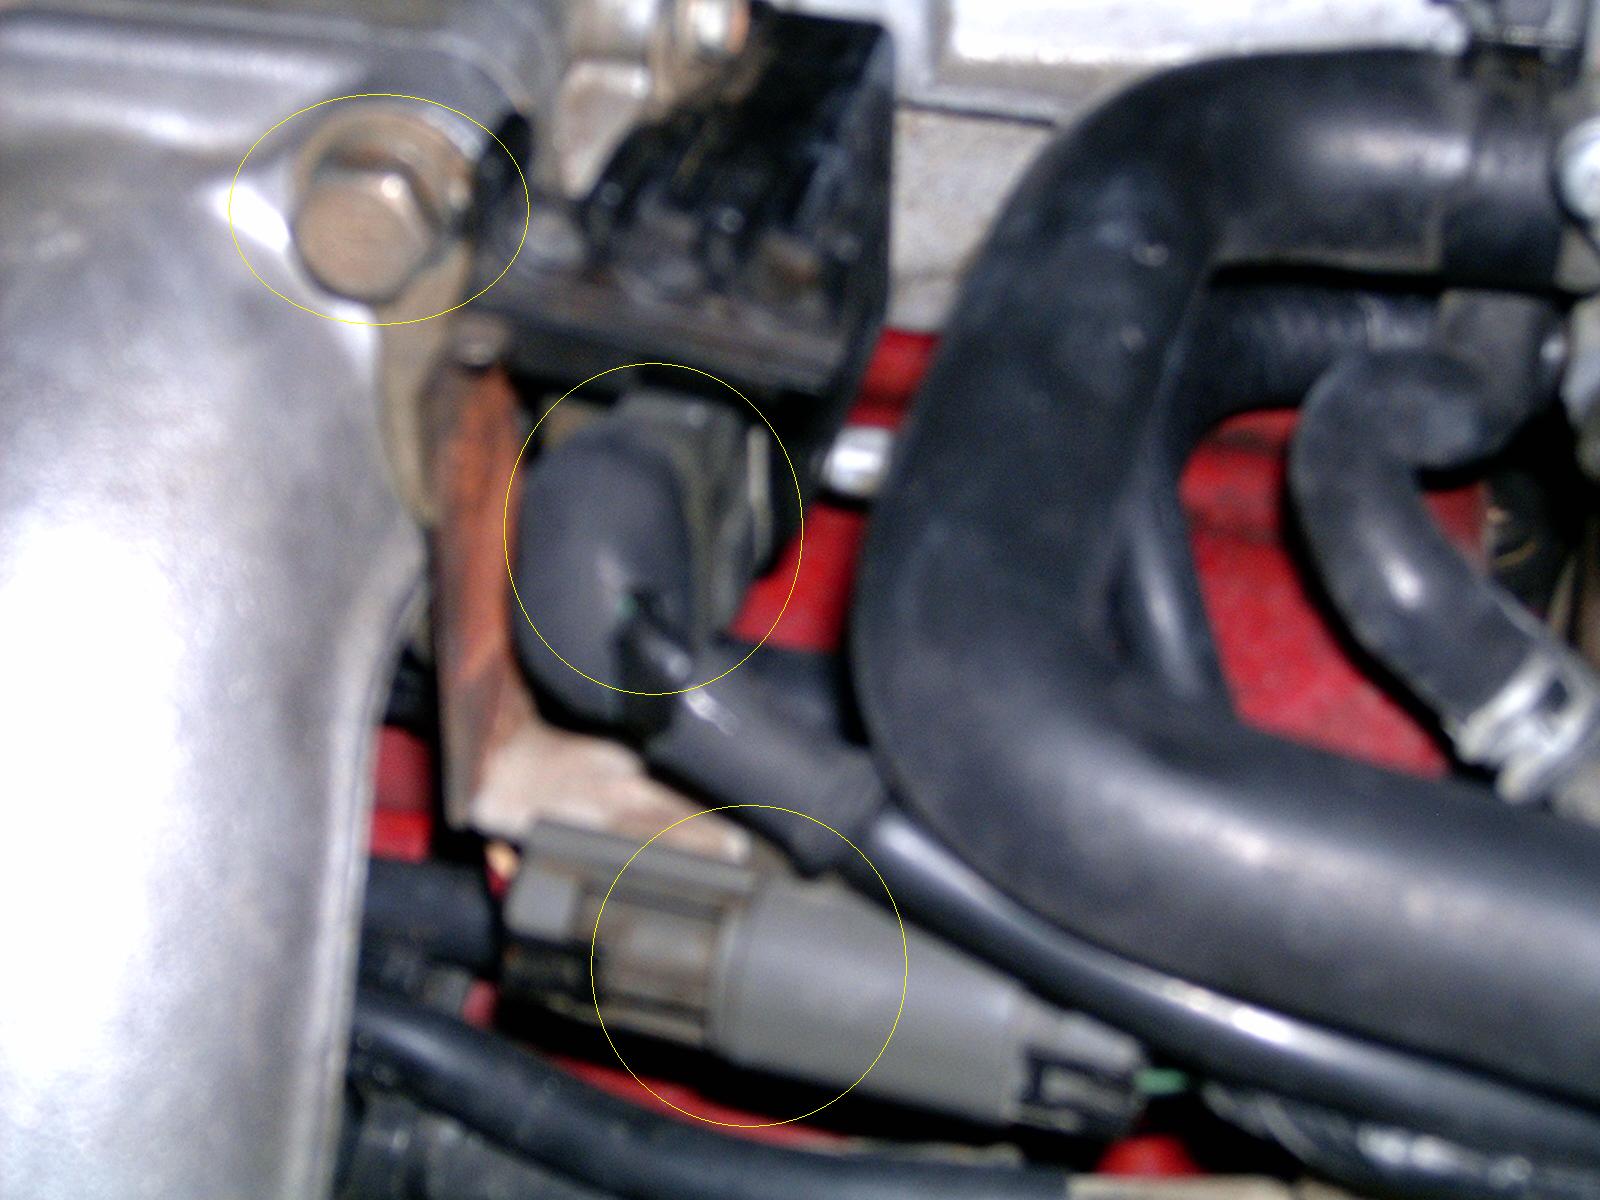
- Disconnect the two plugs from the throttle position sensor area. The black one with the rubber boot has a wire keeper similar to, but not the same as, the fuel injector keeper. You do not need to remove it but can just pry it up on both legs and pull the plug out. The keeper remains on the plug and you just push it back in place when you're finished with the job. The grey one has a push button that you press and then slide the connector apart.
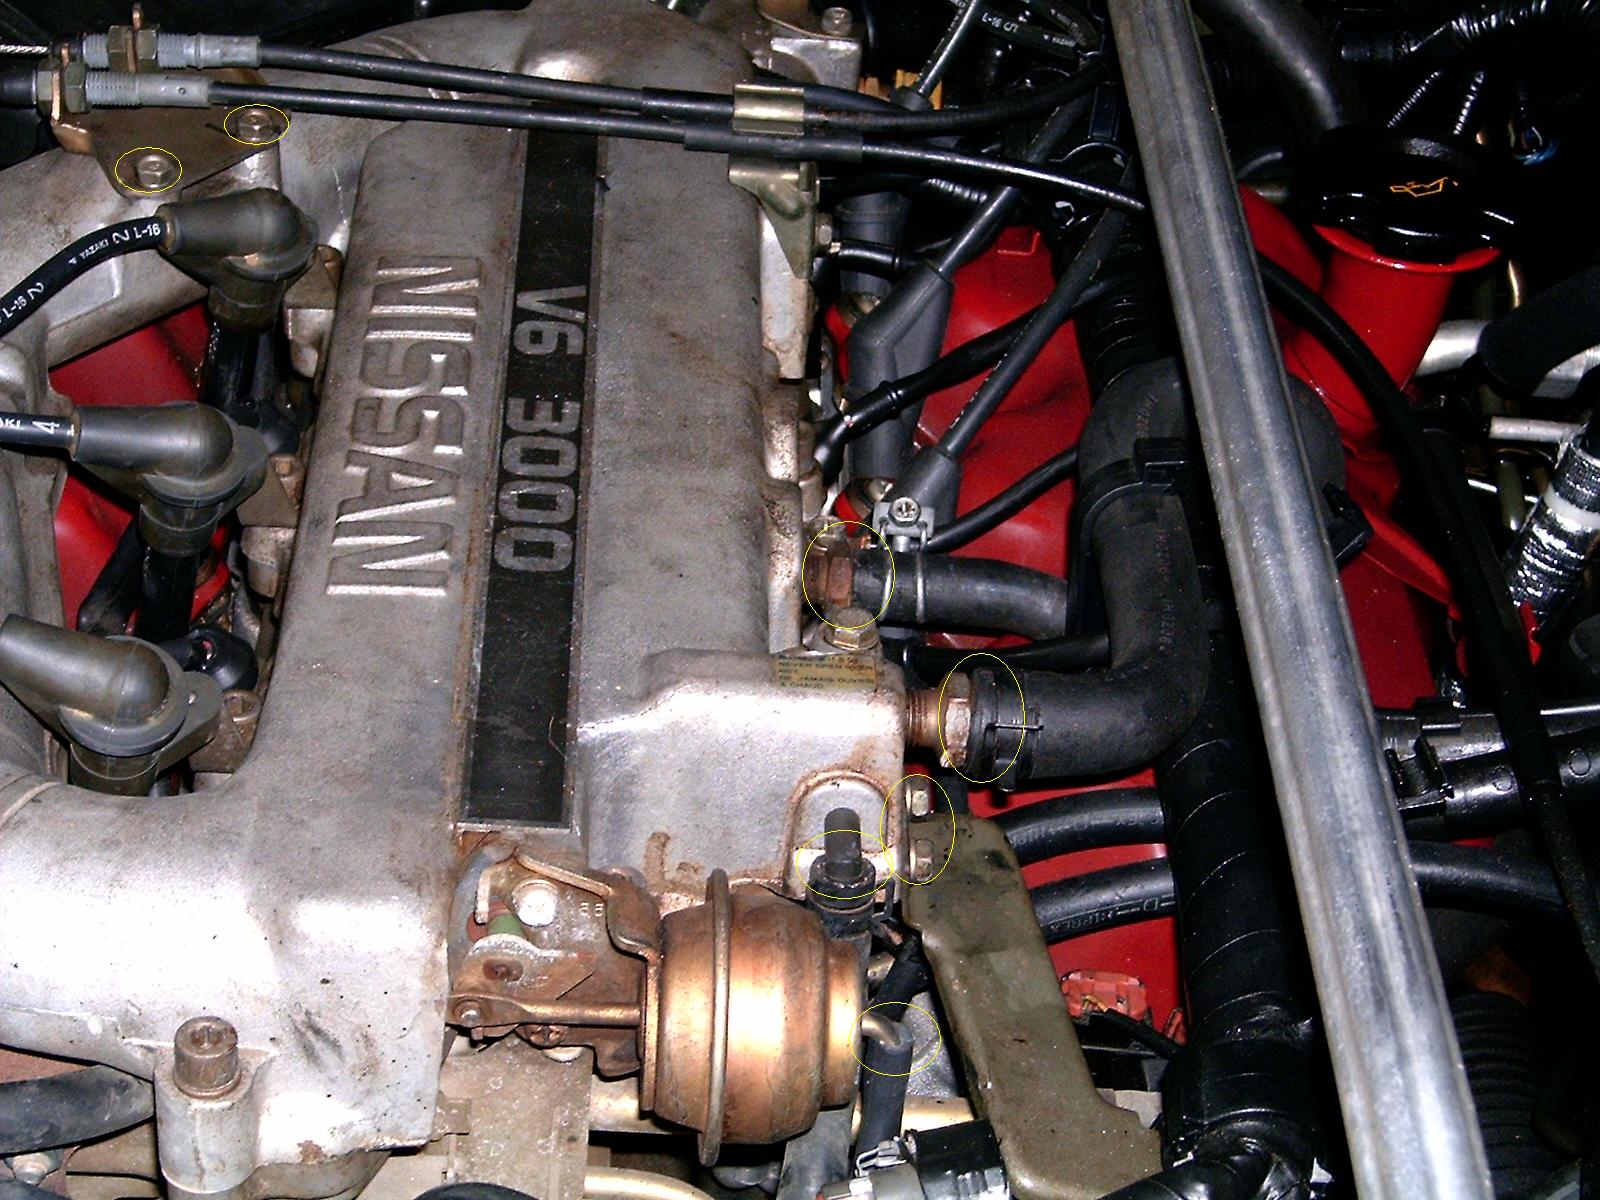
- Disconnect the PCV hose and all others behind the intake plenum. Some hoses use a spring clamp, some use the Phillips head clamp and some use no clamp at all. Again, use caution so you don't damage any of these hoses. Also disconnect the two ground wires from the rear of the plenum area (these can actually wait as they are part of the lower intake manifold). The large hose in the middle of the back part of the upper intake uses a screw clamp that will likely need to be disassembled to be moved. Be careful not to lose the screw, flat plate with two holes and the small washer that goes near the tip of the screw.
- Disconnect the vacuum hoses from under the throttle body and from the EGR valve. Remember to mark with masking tape any hoses or wires you have to remove.
- Remove the EGR valve (only if you're cleaning it). First, remove the large flare tube using an open end wrench. If you have the proper size wrench that's great but it is quite large so I wouldn't expect the common tool chest to have it. Spray it down with penetrating oil and let it sit a minute so it is easier to break loose. It's pretty tight so remember to put it back on pretty tight on reinstallation. I had to tap the end of the wrench with a rubber mallet to get it to break. Once the flare tube is off remove the two 12mm nuts that hold the EGR valve onto the plenum. You'll probably want to spray them down with penetrating oil before attempting removal as well.
- Now that the EGR valve is off use some throttle body cleaner and spray it into the two holes on the valve (not the bolt holes). One hole is where the flare tube connected and the other is where the EGR gasket attaches. Spray some cleaner in and shake it around. The holes are connected so the fluid should flow out easily. Spray some more in and use your fingers to gently push up on the inside of the EGR valve. There is a disc that moves up and down and manually working it will help loosen it up. I used the tutorial on this page. It's for the VE30DE but it's the same process for the VG30E.
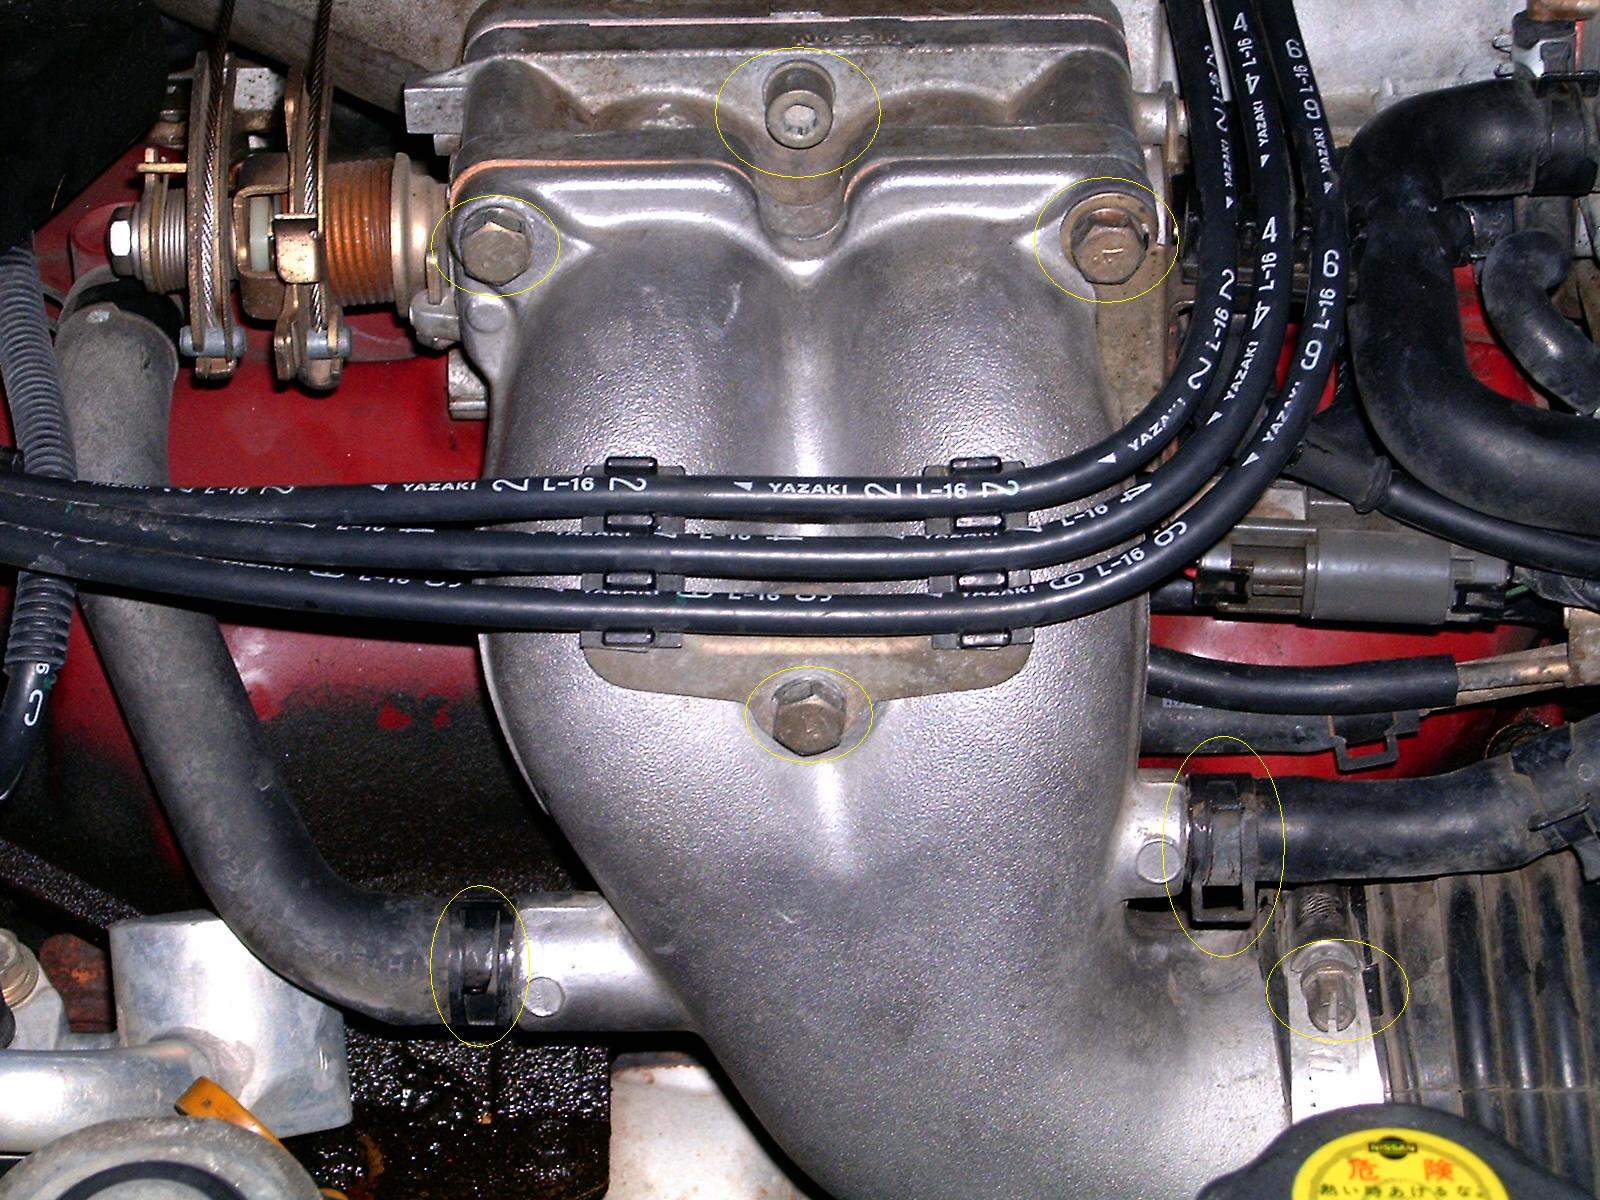
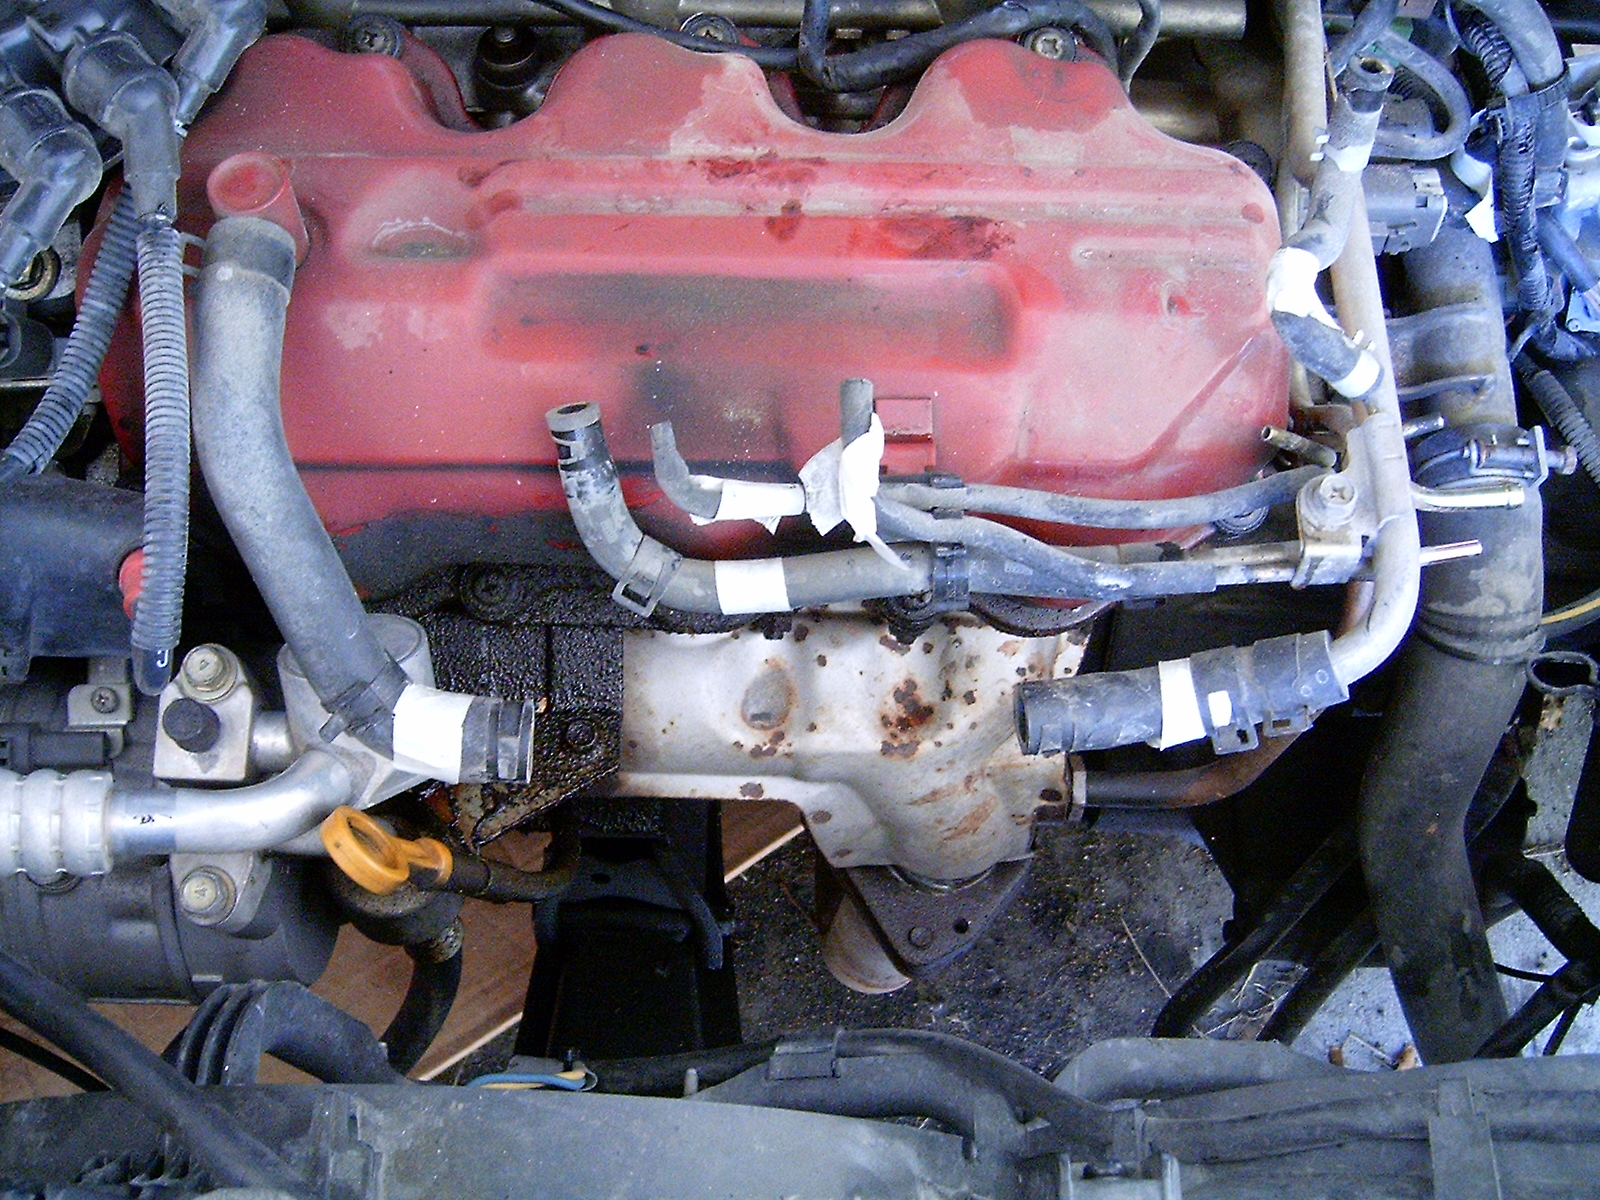
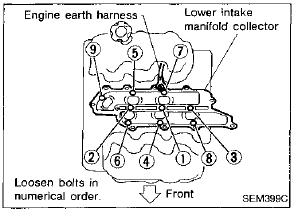
- Remove the upper intake plenum. There are eleven 6mm Allen head bolts that need to be removed and they vary in length so keep track of which go where. I just laid them in a line as I removed them in order but used a segmented box for later injector replacements which is preferable. Make sure there nowhere that you might kick them. You will want to use the socket set for this and it's required in order to torque the bolts upon reinstallation. There is a sequence to follow for loosening and tightening the plenum bolts. See the image below. Note that if you want to replace the front rocker cover gasket (under the large red rocker cover) now is a good time to do it. In addition to what you have already done you need to remove the distributor and the bracket near the distributor that holds a single electrical connector plug. That's not covered here but I used this as an opportunity to do it for myself as I suspect mine was leaking based on the accumulation of oil in the area. My old gasket was also rock hard which is not what you want in a rubber gasket.
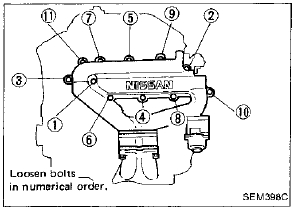
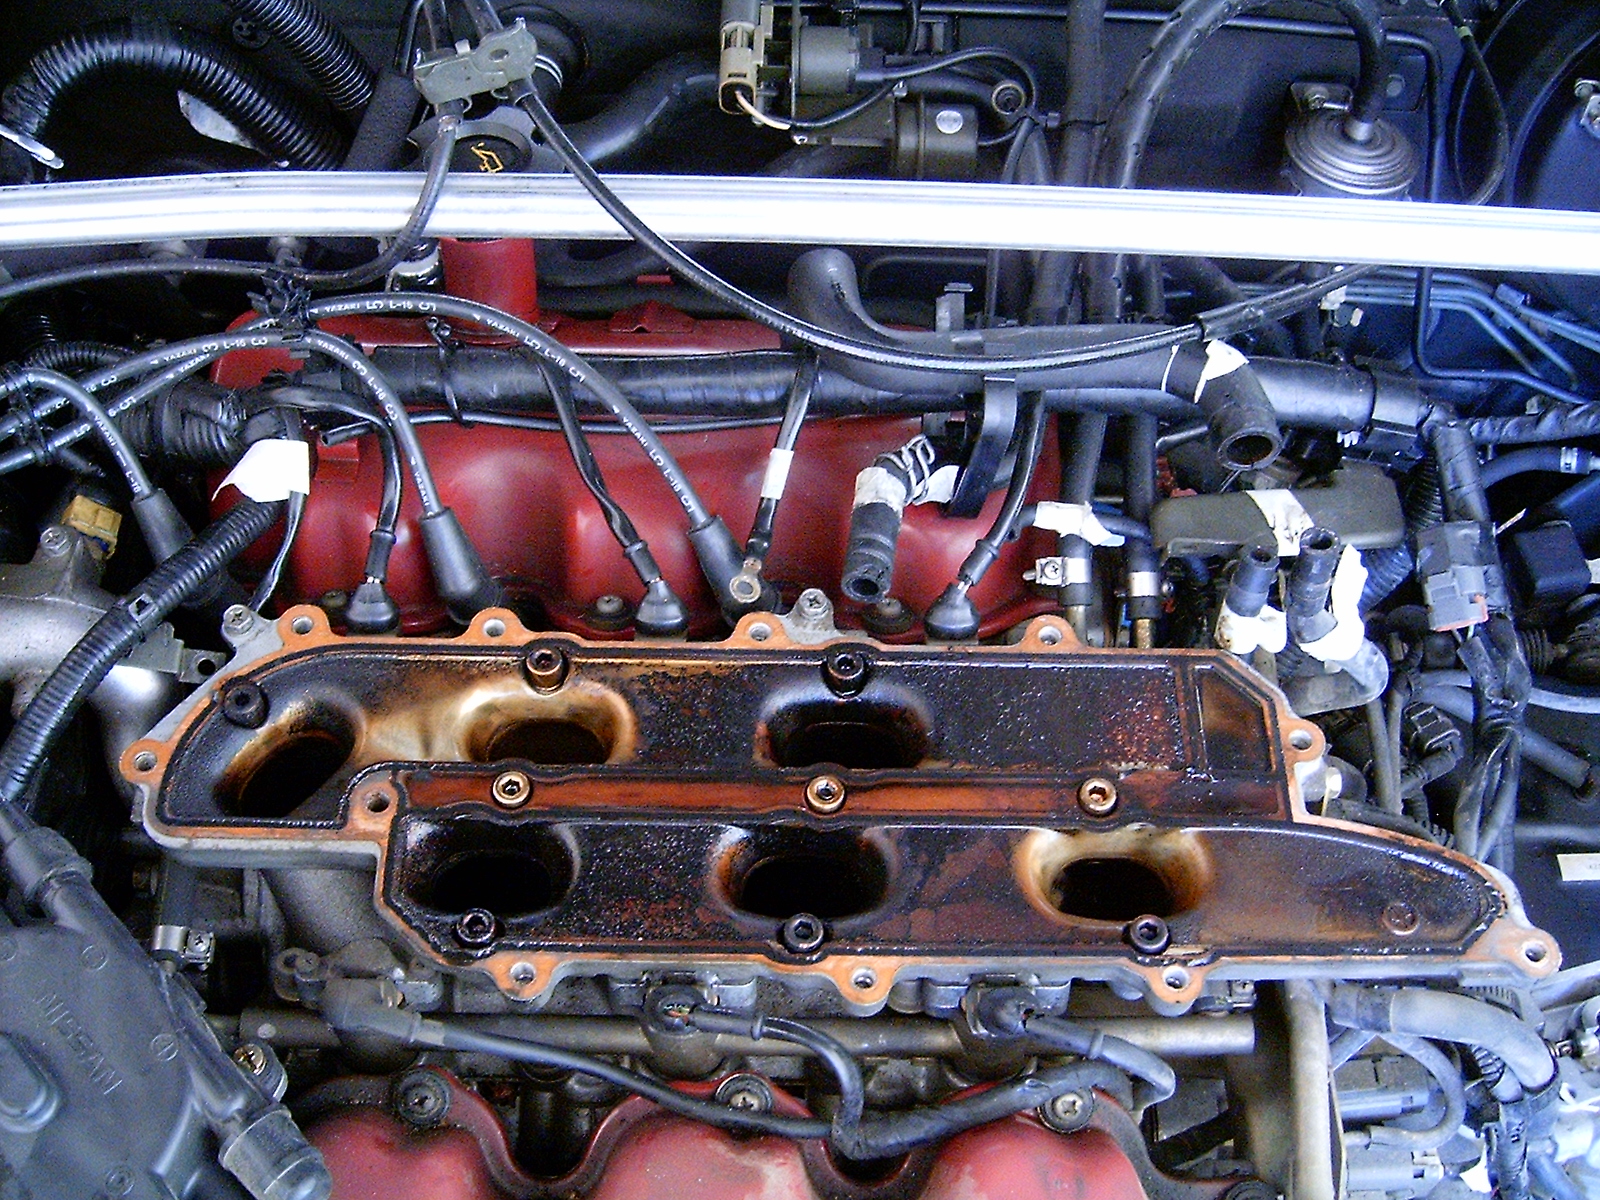
- Now remove the lower intake manifold collector. There are nine 6mm Allen head bolts here and they are all the same length. Reference the image below for the loosening and tightening sequence.
- Remove the fuel injector plug harnesses from any injectors you're replacing. Label them if necessary though it should be obvious where they go. Remember to be careful not to lose the clips if you didn't take them off prior to starting the process. I'd recommend placing a rag over the intake manifold or stuffing a paper towel into the holes so you don't drop a clip into it. Don't ask me how I know. A telescoping magnet is helpful for any clips or screws that manage to make a run for it.
- Now remove the metal cap off of any fuel injectors that need to be replaced (if you're not replacing them all). It takes a strong Phillips head screwdriver to get them off. Be careful not to strip the screw head. I used a Phillips head bit and a short extension from my Skewdriver set in conjunction with a small socket wrench with a 1/4" socket. Penetrating oil will help loosen the screws ahead of time. Each cap should have an odd half-moon shaped rubber space with a thin metal cap that sits between the metal clamping cap and the injector. The GP Sorensen injector I recently purchased had a new one of these but most others I've used do not. Make sure your injector cap has this intact before replacing.
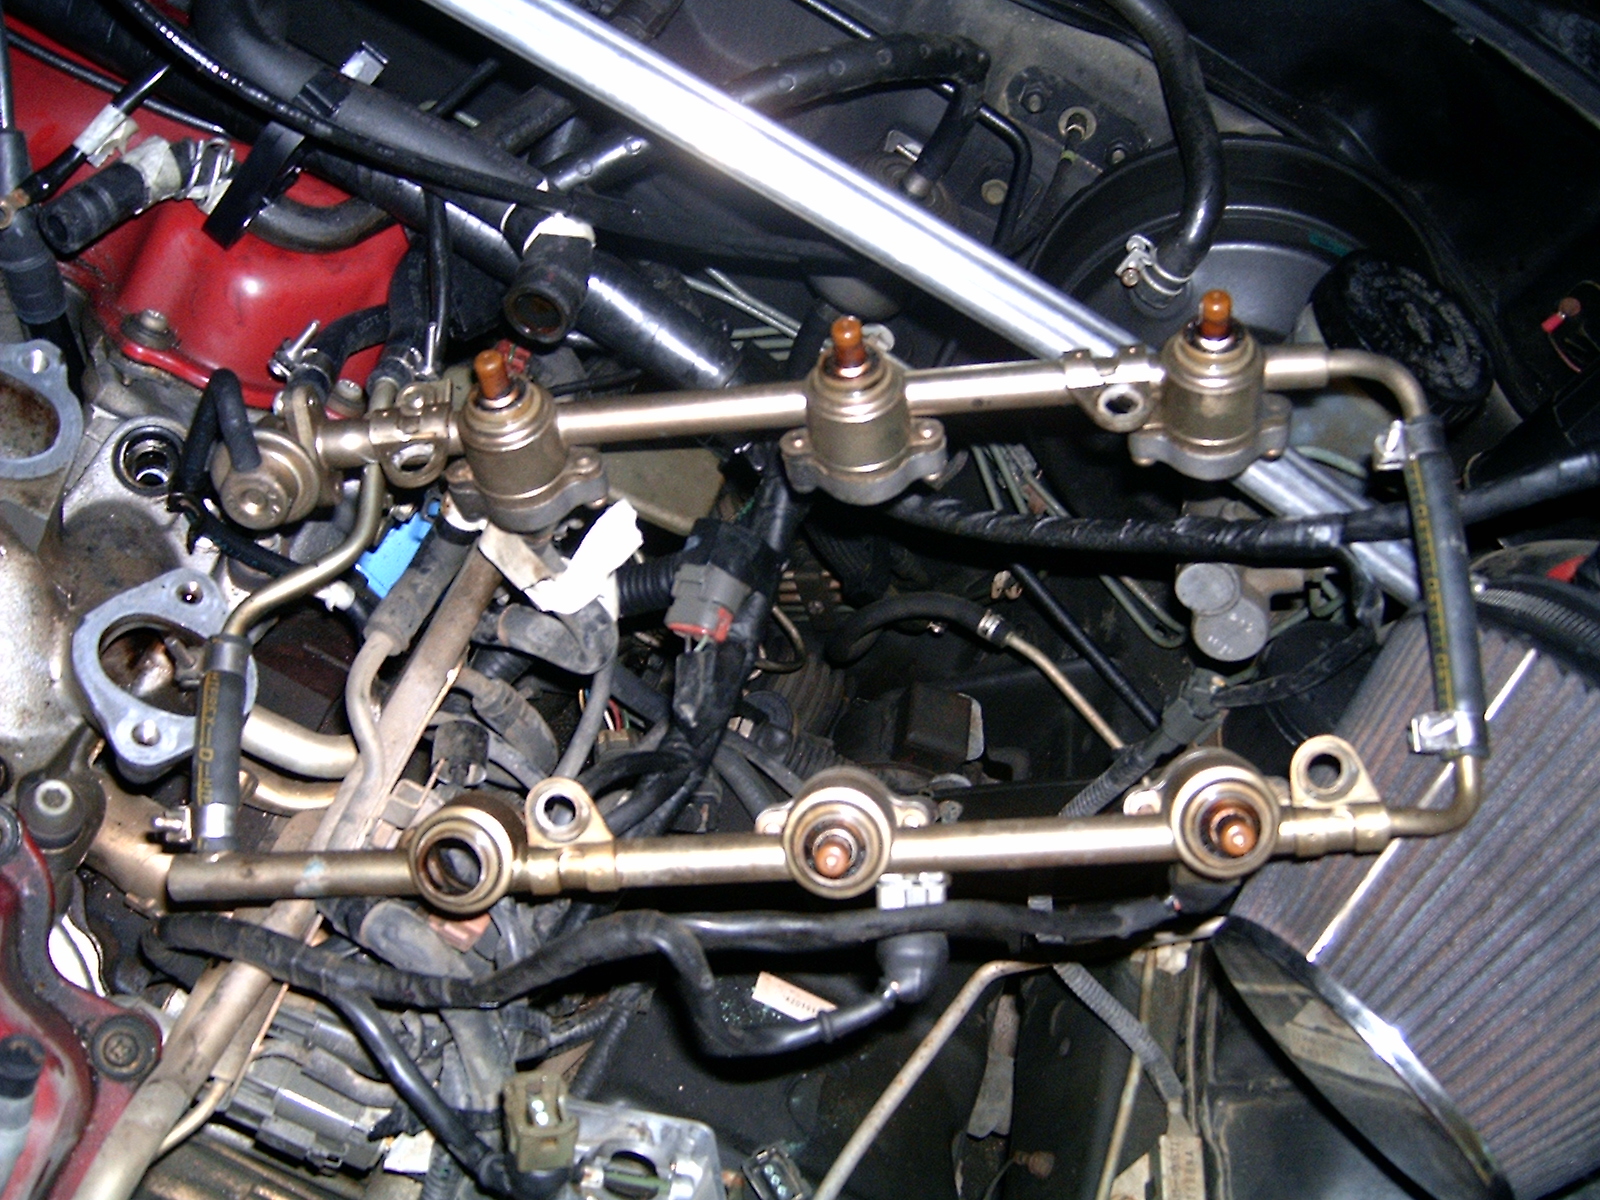
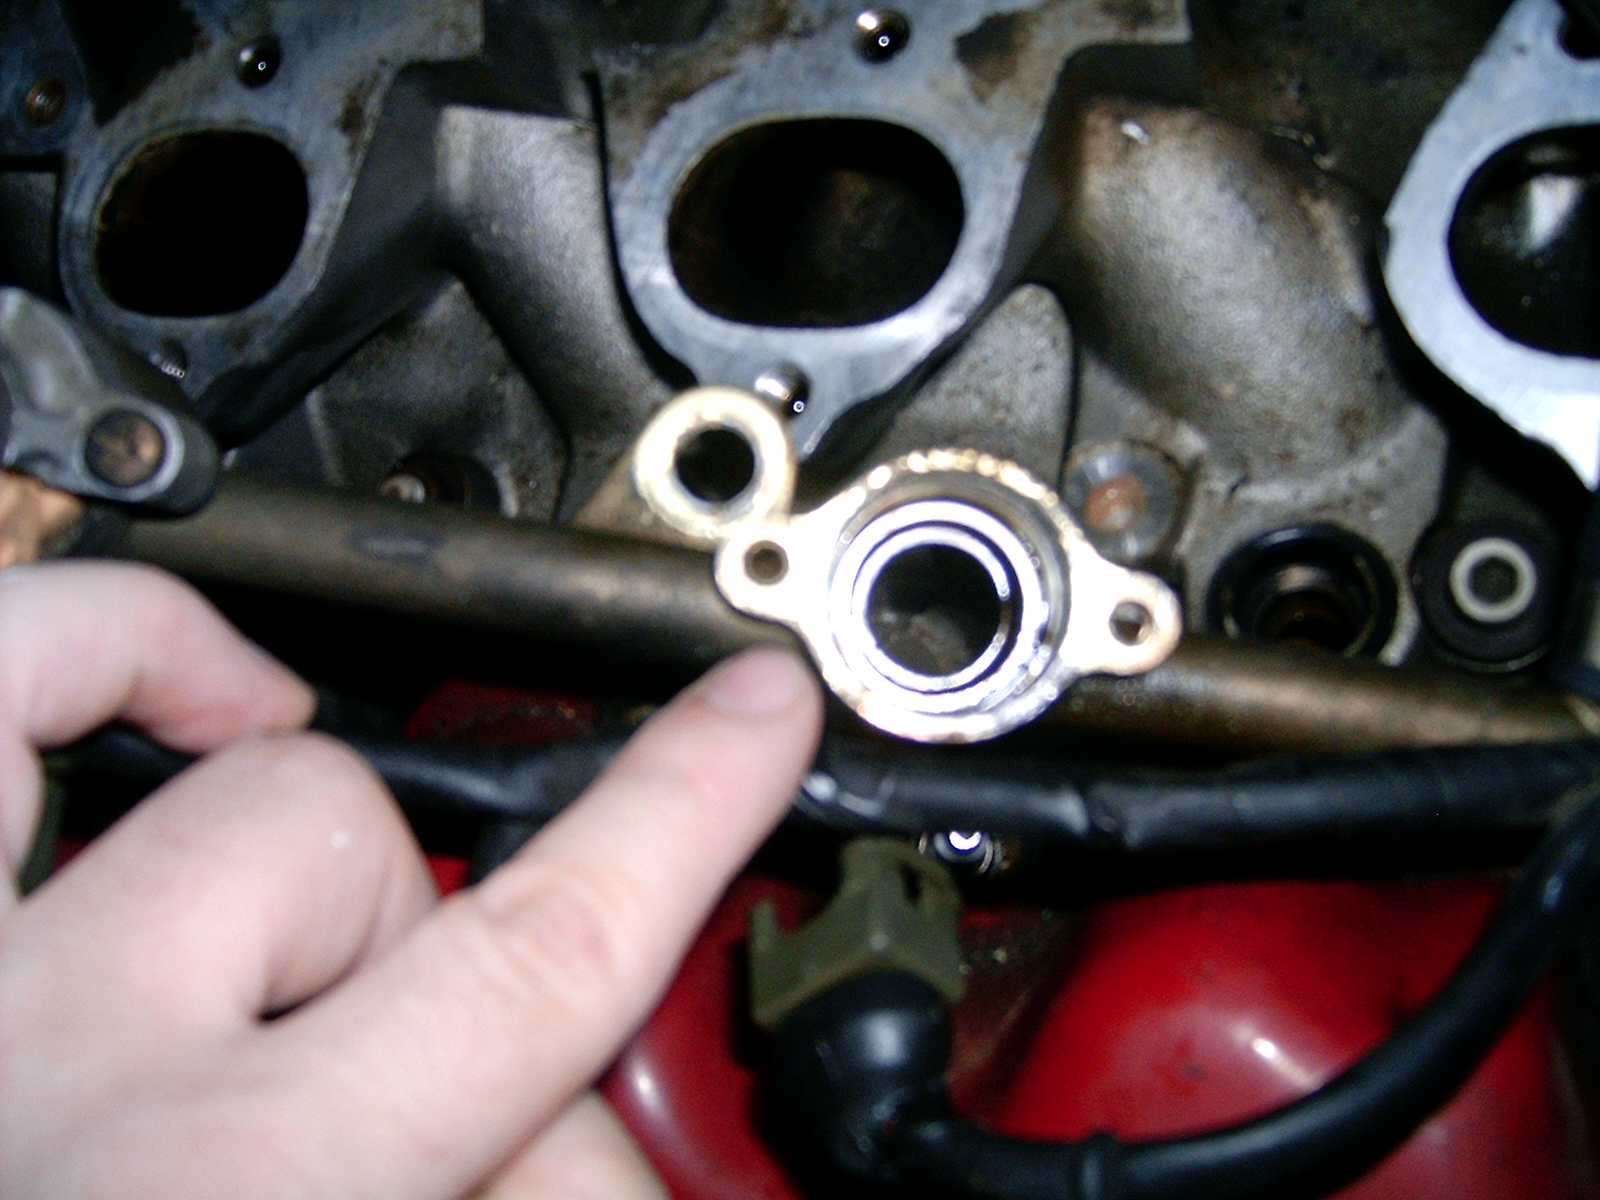
- Now remove the fuel rail (this is what holds all of the injectors in place). It is held in by four 6mm Allen head bolts. Not that the bolts have a series of washers on them. Starting from the top (head side) of the bolt it goes: small washer/big washer/rubber spacer/big washer. Then under the fuel rail there is a hard rubber spacer between the manifold and the fuel rail (four of them, one for each Allen head bolt).
- Once the rail is removed, and you have accounted for the four hard rubber spacers, check the condition of the six rubber insulators that the injectors seat into once the rail is in place. I didn't pay any attention to these the first few times I did this but this last time a couple of them were wearing out. I got the ten dollar kit from Autozone (linked above in the parts list) and used the six insulators in that to replace the factory insulators.
- I am told you "can" pull the injector by twisting it but I ended up shredding the plastic end of the injector. I don't recommend this. Instead I would remove the fuel rail and then pop the injector out from the other side. Since the injector is dead it doesn't matter if you break it. This last time I just took a mallet and popped the injector on the plastic hood and it went flying out. Just make sure you are hitting the right injector. Since you're popping from the other side you could get confused. Double check. And be careful not to break any of the plastic hoods that cover any of the good injectors. They're fragile and I believe are meant to protect the injector's valve. I actually did break one but took my chances and installed it anyway. It seems to work fine and I think the plastic hood mainly protects the valve though it may also help with the spray pattern.
- Notice that there is an O-ring in the fuel rail of the removed injector. Just pry this out and throw it away. Mine seemed fine but they come with new injectors. Just verify your new injectors have them before you toss the old ones. Lube up the O-rings with a little motor oil before slipping them on. I just grabbed a little off of the dipstick. NOTE: It has been suggested that motor oil is not a good lubricant to use for the O-rings. I continue to use it but petroleum jelly (Vaseline) has been offered as an alternative. I think the service manual recommends gasoline which makes more sense.
- Replace the fuel rail remembering to install the hard rubber spacers between the rail and the manifold and the sequence on each of the Allen head bolts.
- Replace the fuel injector(s) by firmly but carefully twisting the injector back and forth until it snugs in place. This last time I just put it in straight and then pushed straight in.
- Replace the metal cap on the fuel injector.
- If possible, place a wire brush on a Dremel and give each injector plug a quick hit on low RPM. This will remove the corrosion that builds up on the terminals. Try to hit the injector and the plug both.
- Make sure the four screw clamps that secure the two rubber fuel hoses to the fuel rails are tight. One of mine loosened during this process and leaked just enough fuel to not be noticed until it started a small flash fire on top of my engine. Yeah, that'll get your attention. I had to completely tear everything down again in order to tighten those clamps.
Cleaning
- Now comes the fun part, cleaning the plenum, manifold and throttle body. This is going to require
- a lot of throttle body cleaner, a toothbrush, paper towels and a razor blade scraper. Removal of the outer throttle body gasket from the intake elbow is what really sucks. I mean REALLY sucks. I followed the tutorial on this page and it was every bit as bad as he said. I also used a Dremel tool with a wire brush to help in the process. Be sure to wear protective eyewear. A stray piece of metal wire to the cornea will really ruin your day, possibly your life.
- All of the other gaskets came off pretty easily but I still used a razor blade scraper in problem areas. The manifolds really cleaned up nicely but you have to use quite a bit of throttle body cleaner, a toothbrush and some elbow grease. Be sure to put down some cardboard and towels to catch all of the nasty residue you clean off. Clean the intake runners of the manifold that remains on the engine using some throttle body cleaner soaked towels. Obviously do all of this in a well ventilated area.
- Take a break after everything is ready for reassembly. At least ten minutes so you're relaxed when you need to install the delicate gaskets and torque the bolts.
p
- Reinstall everything with new gaskets using care not to damage the new gaskets and that you align them properly. Torque all the bolts that have listed torque specs.
- Lower intake manifold bolts- 13-16 ft-lbs
- Intake plenum bolts - 13-16 ft-lbs
- IACV-AAC valve bolts - 4.6-6.1 ft-lbs
- Throttle chamber bolts - 13-16 ft-lbs
- Intake elbow 12mm bolts - 13-16 ft-lbs
- EGR valve 12mm bolts - 9-13 ft-lbs
- Here are the two torque sequence diagrams again
- Don't forget to reconnect the negative battery terminal and reinstall the fuel pump fuse.
- Here's something that shouldn't happen but it did to me so I want to pass it along. After getting everything running correctly my car would start burning oil about 30 seconds after starting. I mean a lot of oil where it would leave a smoke trail behind me. It freaked me out but I finally researched enough to find out it was a bad PCV valve (which I had just replaced two months earlier). I don't know if I did something to damage it or got some trash in the valve but it failed and a $4 replacement part at Autozone fixed the problem (although I'm going to replace that with an OEM Nissan valve ASAP).